Day 1 of O365
Hello Everyone , Welcome in Day 1 of Office365 Training
-
Training Location : Infosys Hyderabad
-
Exam Code : 70-347 (Enabling and Managing Office365)
Greetings to my unbelievable – extraordinary students across the globe . Right now I am in Infosys Hyderabad Campus . Spending a great week over here with great peoples . Sharing knowledge is another way to learn more . So I am in a process of learn more and empowering every person and organization in the planet to achieve more .
Thanks to Infosys for this great platform .
Today we will cover this three module .
Module 1: Planning and provisioning Office 365
Module 2: Managing Office 365 users and groups
Module 3: Configuring client connectivity to Microsoft Office 365
What is Office 365 ?
Ans : Office 365 is a another cloud implementation from Microsoft . It’s a PaaS . O365 is a combination of multiple products . Where the main product’s are Exchange Online, Share-point Online,Skype For Business , Office Pro Plus and Azure AD .
Subscription or how to start with ?
To use O365 at first you have to purchase a subscription . You can choose from a various number of options . Based on your requirement you can choose your subscription . Please Open this link and have a look of all subscription .


Home Subscription license is limited to 5 user , where personal is 1 user . Business user are limited to take 300 user subscription . Enterprise subscription has no limit . So we will focus on Enterprise subscription :-

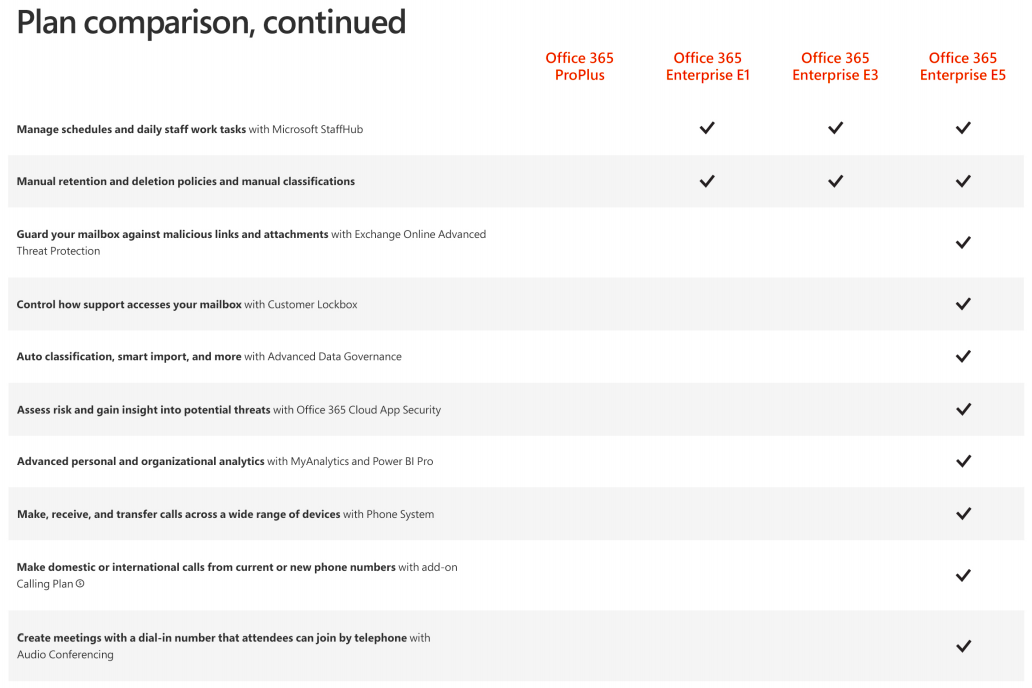
What is the difference between E1 , E3 and E5 ?
Click on this link to get complete comparision table : https://query.prod.cms.rt.microsoft.com/cms/api/am/binary/RWfFso
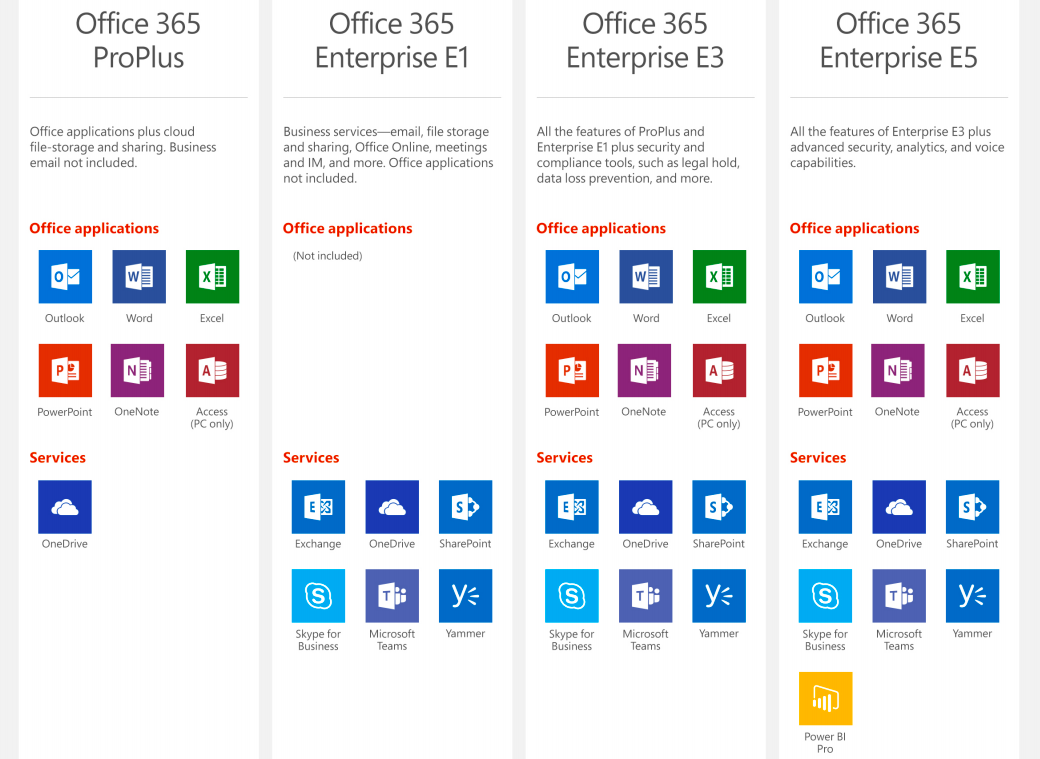
Most of the time we are confused in the difference between E3 and E5 ?
Ans :
How you can get a free subscription of O365 ?
Ans : At first create a hotmail or outlook email ID . To create a new outlook ID follow this link NEW OUTLOOK .
and the click here Link To Get a O365 Free Subscription . Fill all details – Create your subscription and use your subscription from portal.office.com .
Why we need a hotmail ID to create a office 365 subscription ?

While you will try to create a subscription you have to go through this page where you have to provide all your details . Here without providing e-mail ID you can not proceed to next step .
What is difference between “sbinfy1@hotmail.com” and “dheeraj@sbinfy1.onmicrosoft.com” ?
sbinfy1@hotmail.com is a hotmail mail id that has been used to create a office365 subscription where “dheeraj” is the super user name and “sbinfy1.onmicrosoft.com” is the default domain name . This name is uqnic across the globe . After creating a subscription with default domain you can add your custom domain in office365 and you can work with that .
Hope you have created your new outlook ID and you have also created a new O365 subscription . Now open portal.office.com and play with your subscription .
User or Identities in O365 ?
First user that you have created or got at the time of subscription creation “dheeraj@sbinfy1.onmicrosoft.com” that user is global user or admin . Now you can create new user to admin for your O365 . User will use o365 subscription and admin people will manage them .
There are three kind of user that you create for O365 .
- Cloud ID
- Sync ID
- Federated ID
How can we create user ?
Ans : You can create user in multiple way .
- O365 Admin portal
- Azure AD
- Powershell
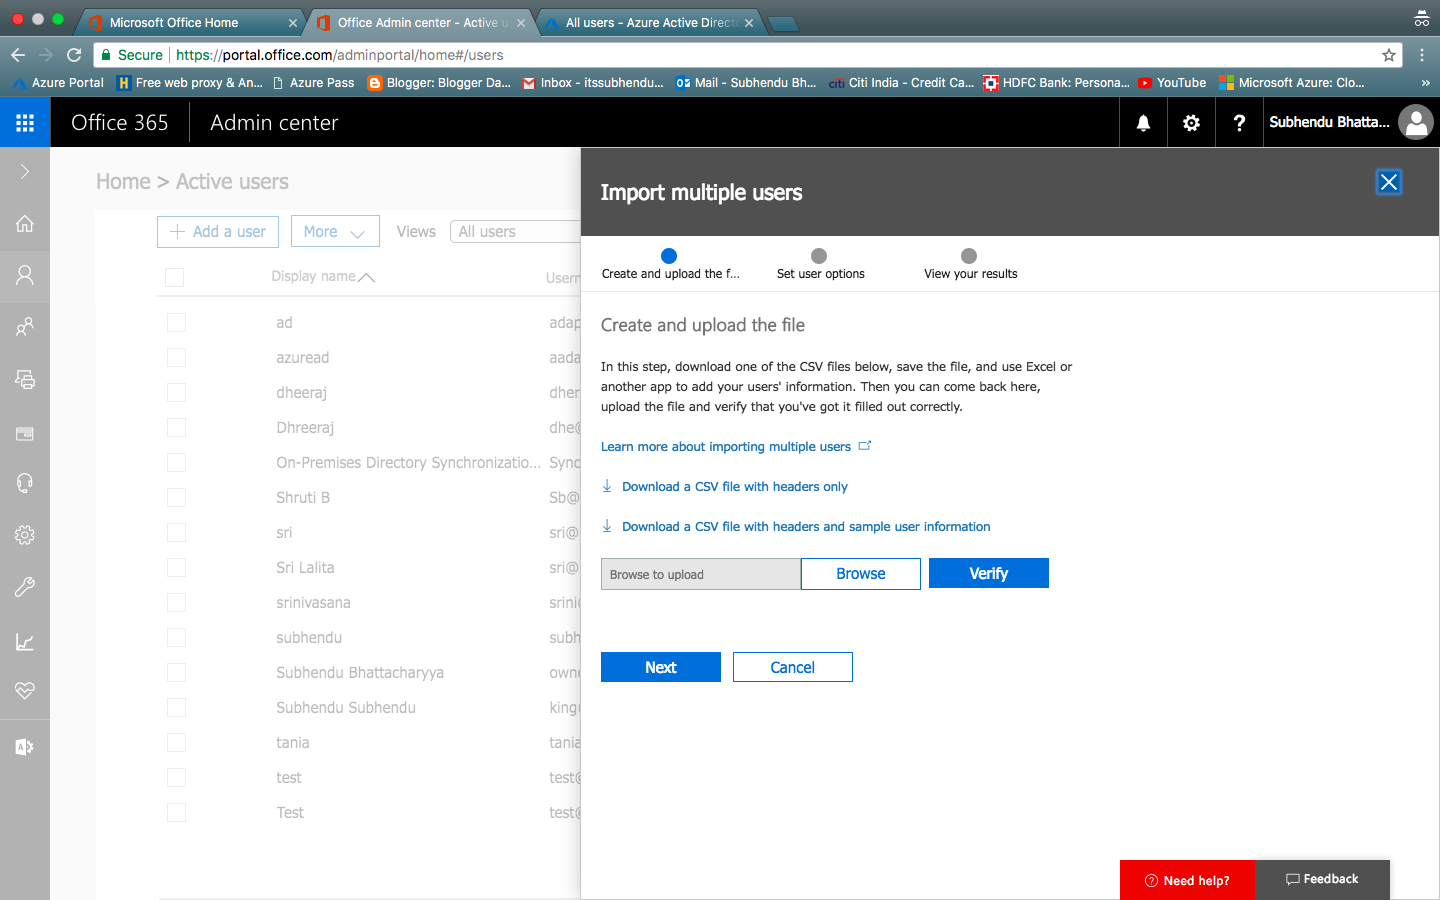
- For bulk addition use .CSV file
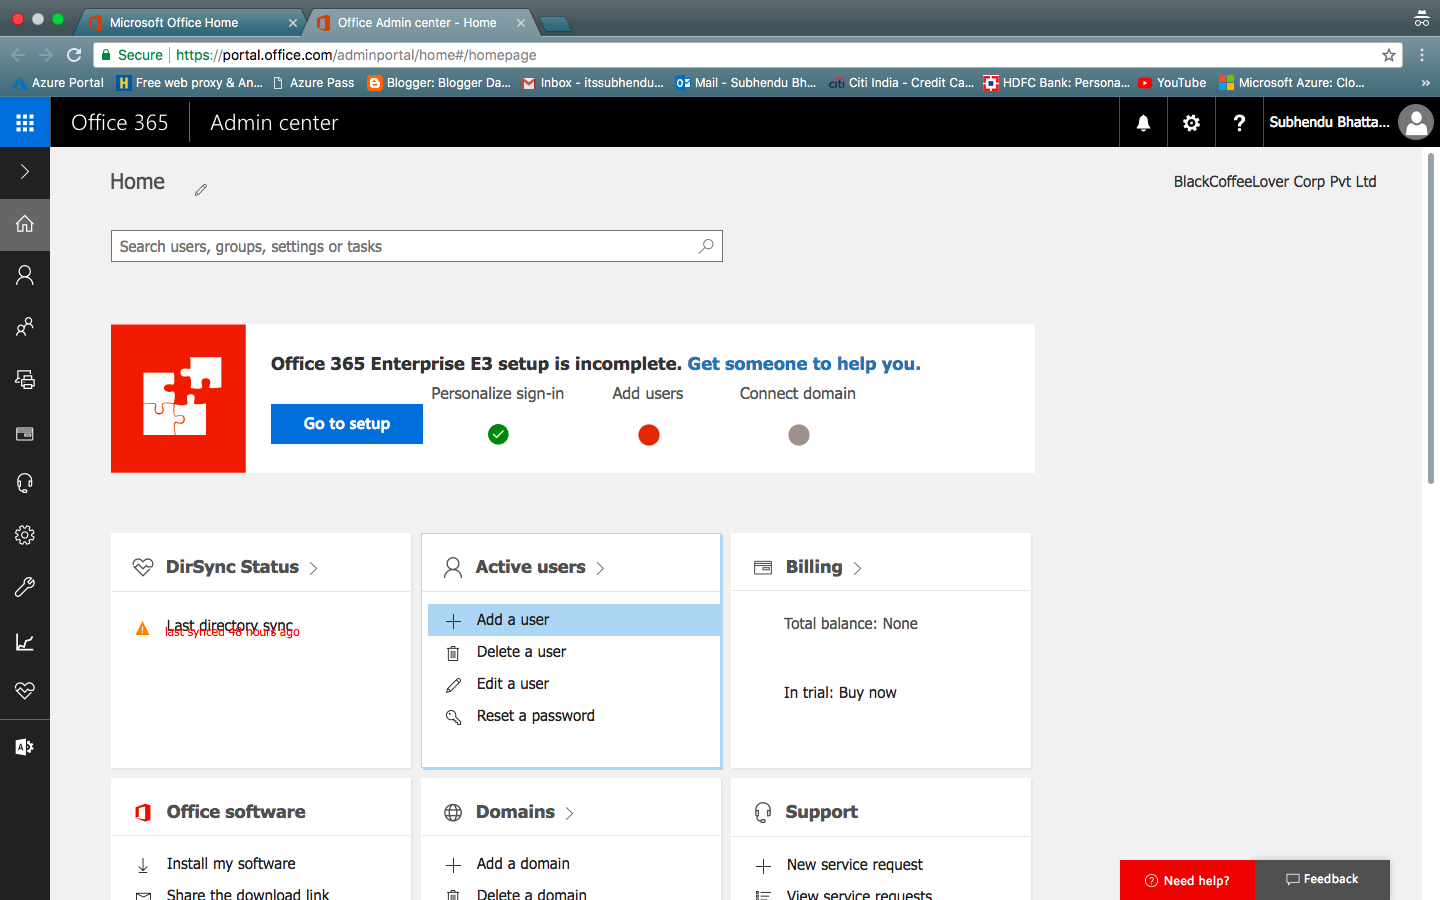
This is the page from 0365 from where you can create user .
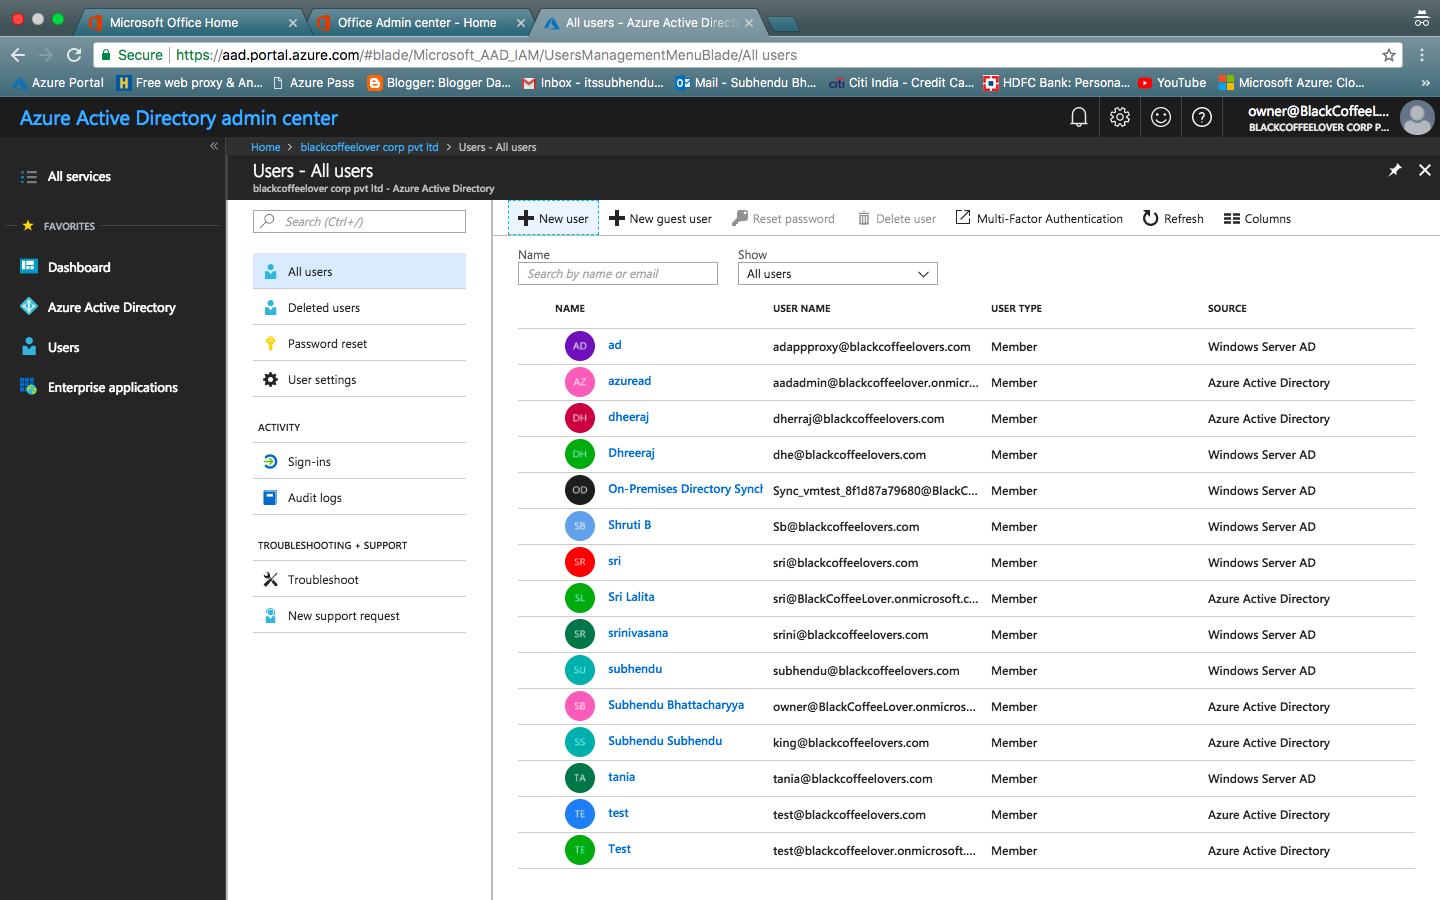
This the page of Azure AD . another option to create user for O365.
CSV File : You can export CSV file from any other application and import that in O365 :-
PowerShell :
What do you need to know before you begin?
- .NET 3.5 + (Click here if you want to download this version of .NET )
- Microsoft Online Services Sign-In Assistant for IT Professionals RTW
- Windows AD module for powershellInstall the the Microsoft Azure Active Directory Module for Windows PowerShell with these steps:
- Open an administrator-level PowerShell command prompt.
- Run the Install-Module MSOnline command.
- If prompted to install the NuGet provider, type Y and press ENTER.
- If prompted to install the module from PSGallery, type Y and press ENTER.
- After installation, close the PowerShell command window.
- Now type “Connect-MSOlservice”
Do you have any issue Refer to ” THiIS LINK ”
PowerShell Syntax :
New-MsolUser -DisplayName <DisplayName> -FirstName <FirstName> -LastName <LastName> -UserPrincipalName <Account> -UsageLocation <CountryCode> -LicenseAssignment <AccountSkuID> [-Password <Password>]
Example :
New-MsolUser -DisplayName “Dheeraj Bhai” -FirstName Dheeraj -LastName Bhai -UserPrincipalName dheeraj@blackcoffeelovers.onmicrosoft.com -UsageLocation US -LicenseAssignment blackcoffeelovers:ENTERPRISEPACK
Now let’s talk about Roles office365 :
User : Who will enjoy the benifit of O365 .
Global Administrator : Accesses all administrative features in the Office 365 suite of services in your plan, including Skype for Business. By default the person who signs up to buy Office 365 becomes a global admin.
Global admins are the only admins who can assign other admin roles. You can have more than one global admin in your organization. As a best practice we recommend that only a few people in your company have this role. It reduces the risk to your business.
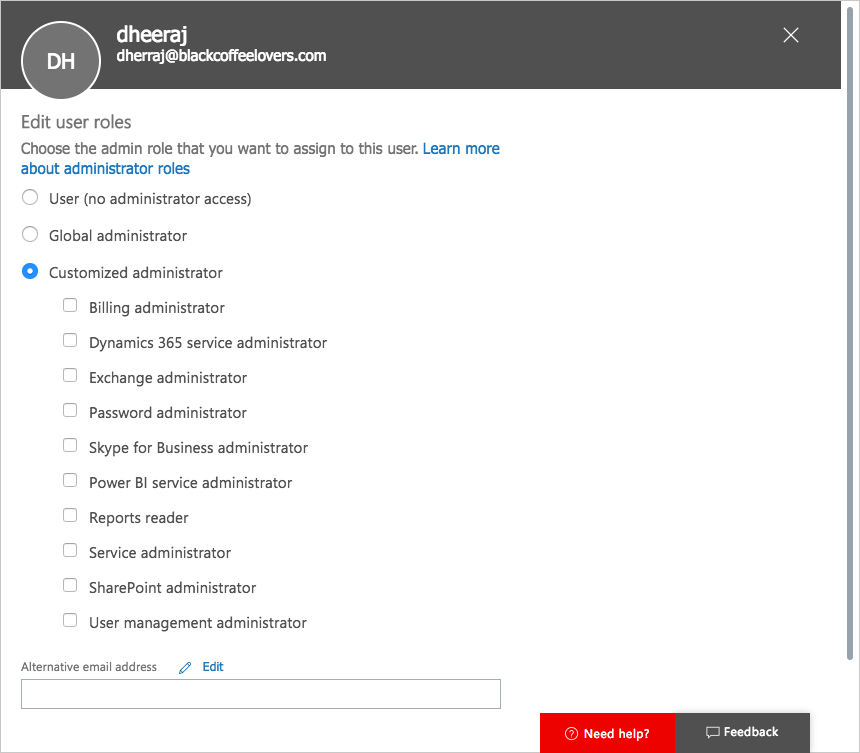
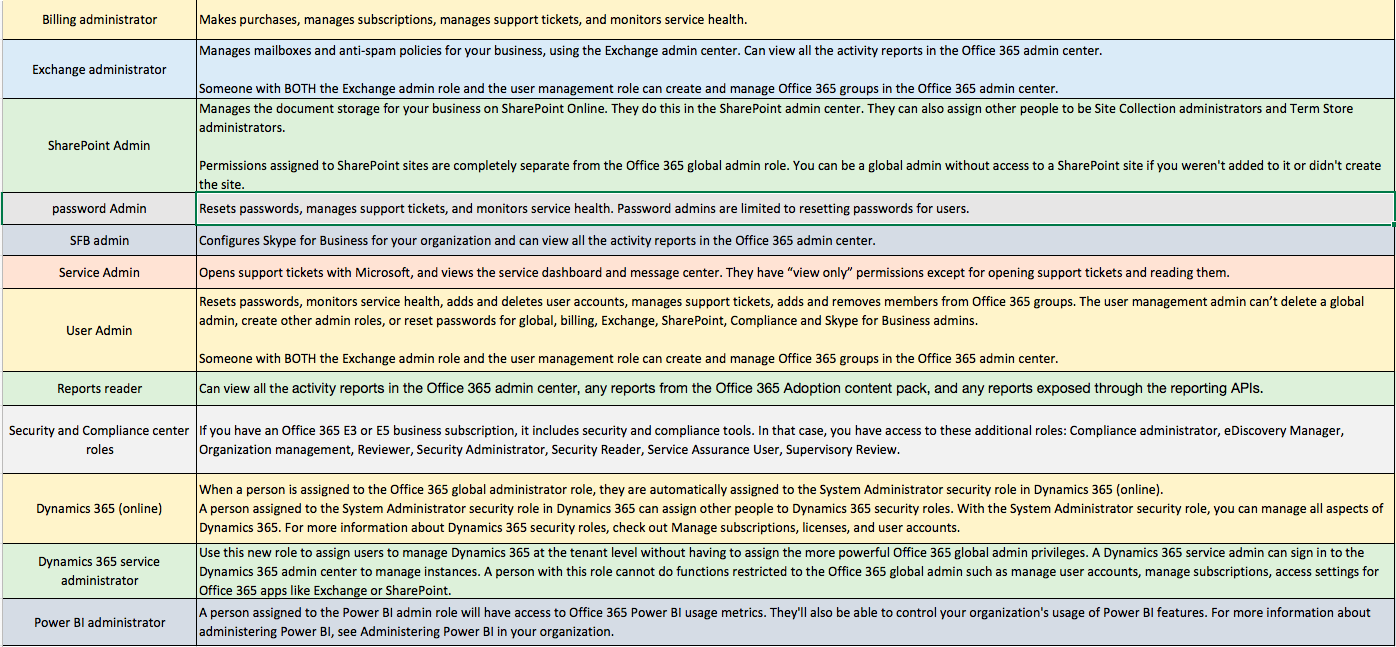
Limited Admin :
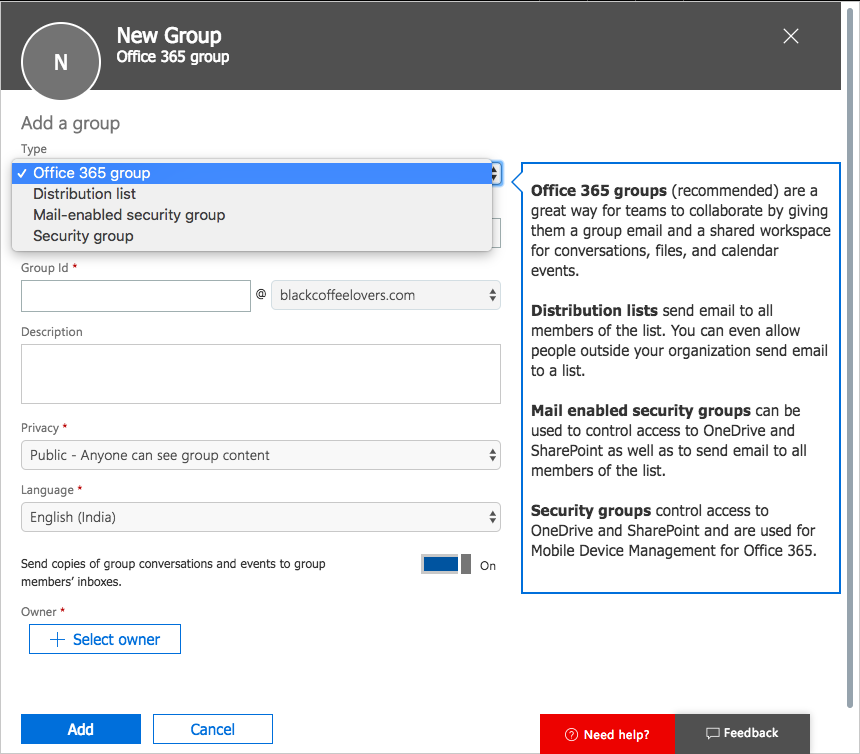
Now I am going to talk about Office365 group :
Gruop is a collection of user to perform cetern task together . It will contain a mail id to communicate .
New-MSolgroup is command powershell .
Us of Custom Domain and adding Custom Domain :
After creating a subscription with default domain we need to add custom domain so that we can get “dheeraj@blackckoffeelovers.com” . Here is the process to add custom domain . Office 365 use TXT and MX record of your DNS server to verify your domain .
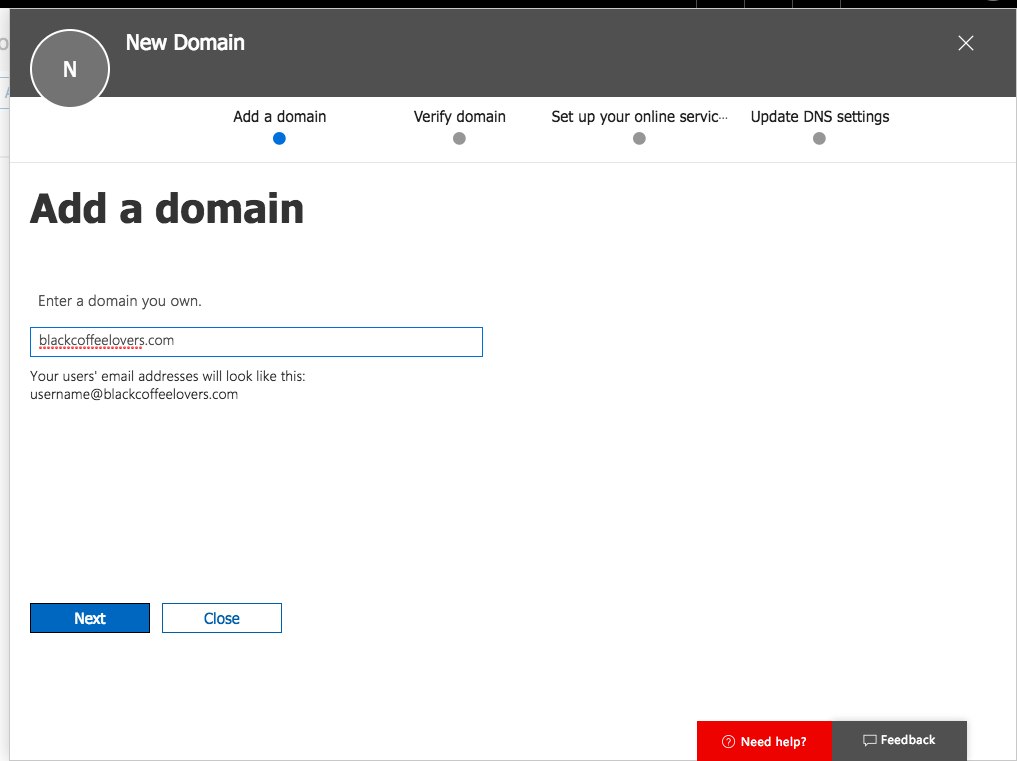
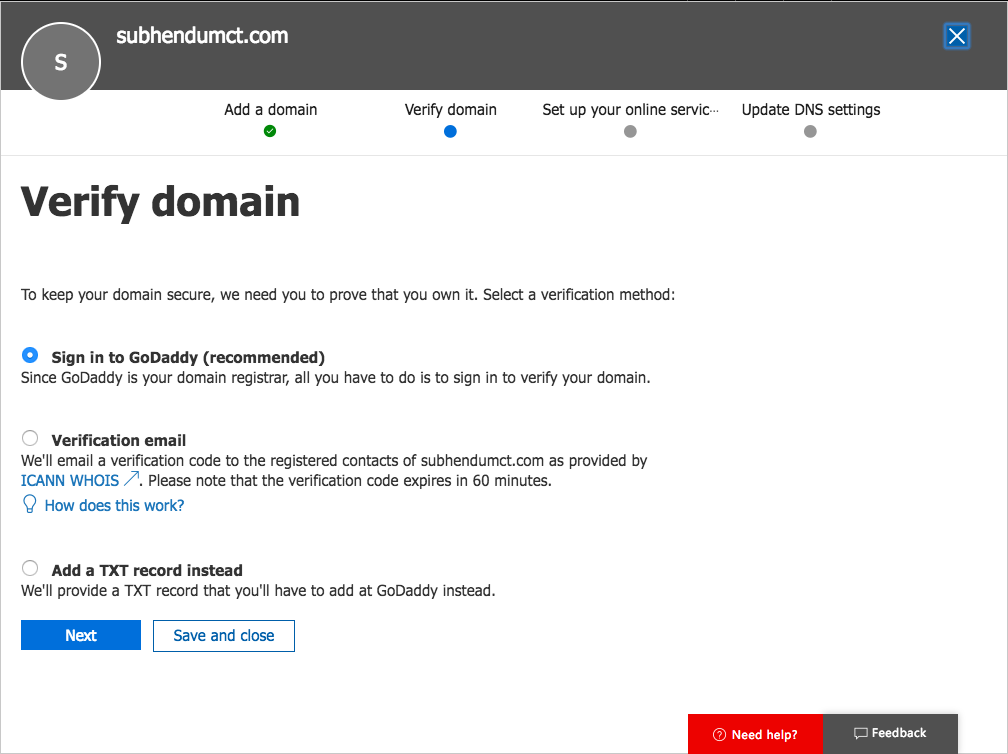
When you will be with this process . O365 will give two record to you and you have to record those record in your Public DNS server . Guys do not get confused in verifying domain name process .
While you will do the practical you will borrow a domain name from “*.o365ready.com” and you have to create a DNS zone in your practice server .
DNS : Domain Naming Service , this is a service you can find in server operating system helps to resolve Domain Name .
DNS Server : A server that hold DNS Role. DNS server works based on records . Records is a set of information that helps DNS server to perform .
DNS Zone : A special segment in DNS server that holds records of either it’s own zone or another zone.
Primary Zone : Read write copy of DNS server.
Secondary Zone : Read only copy of primary zone.
Stub Zone : SOA,NS,Glue host record .
_________________________________________________________________________________________
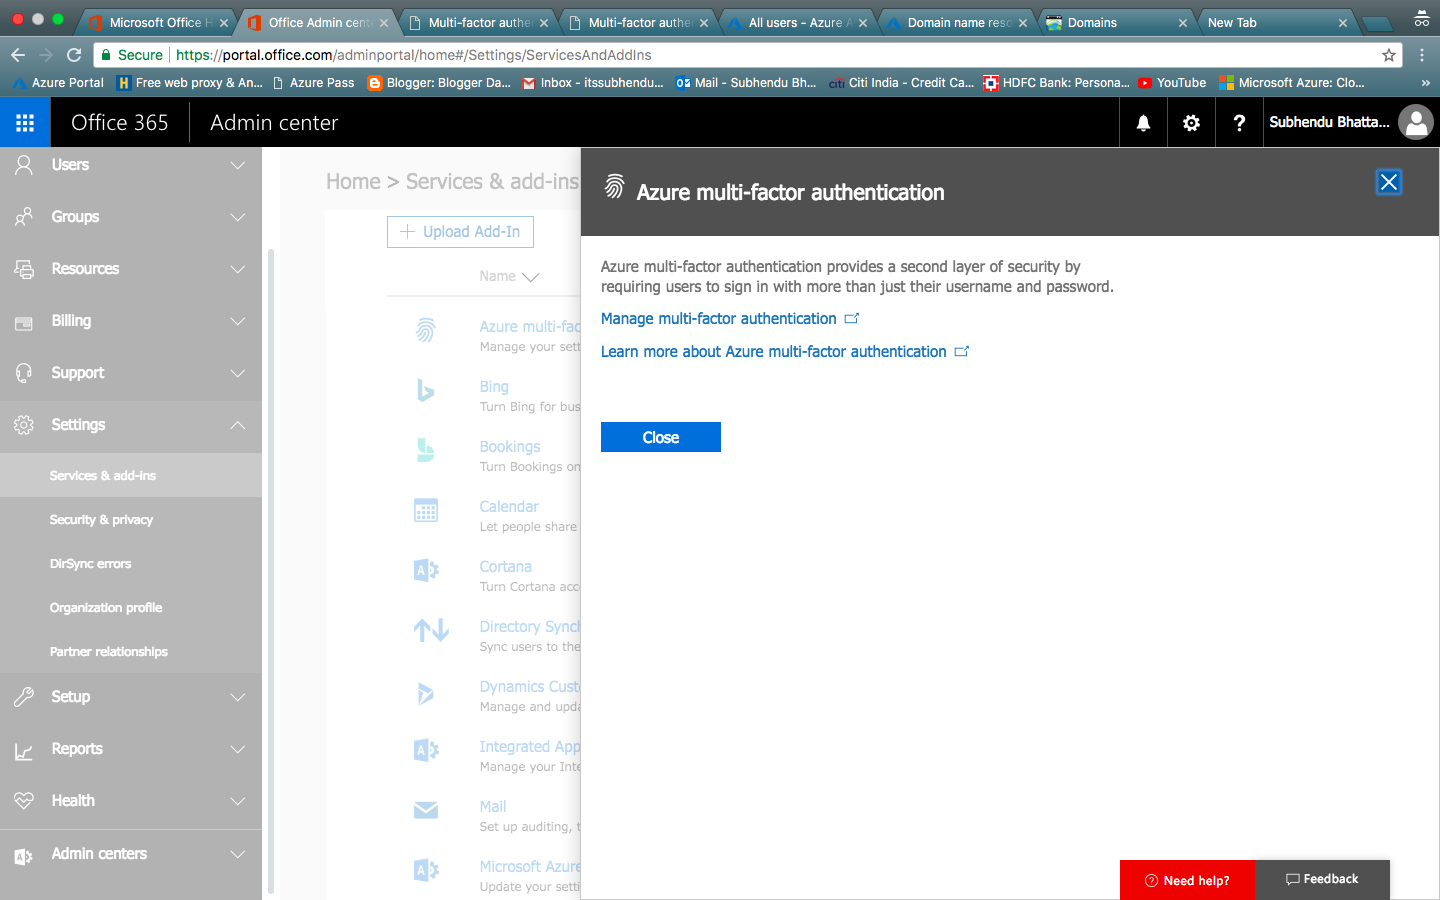
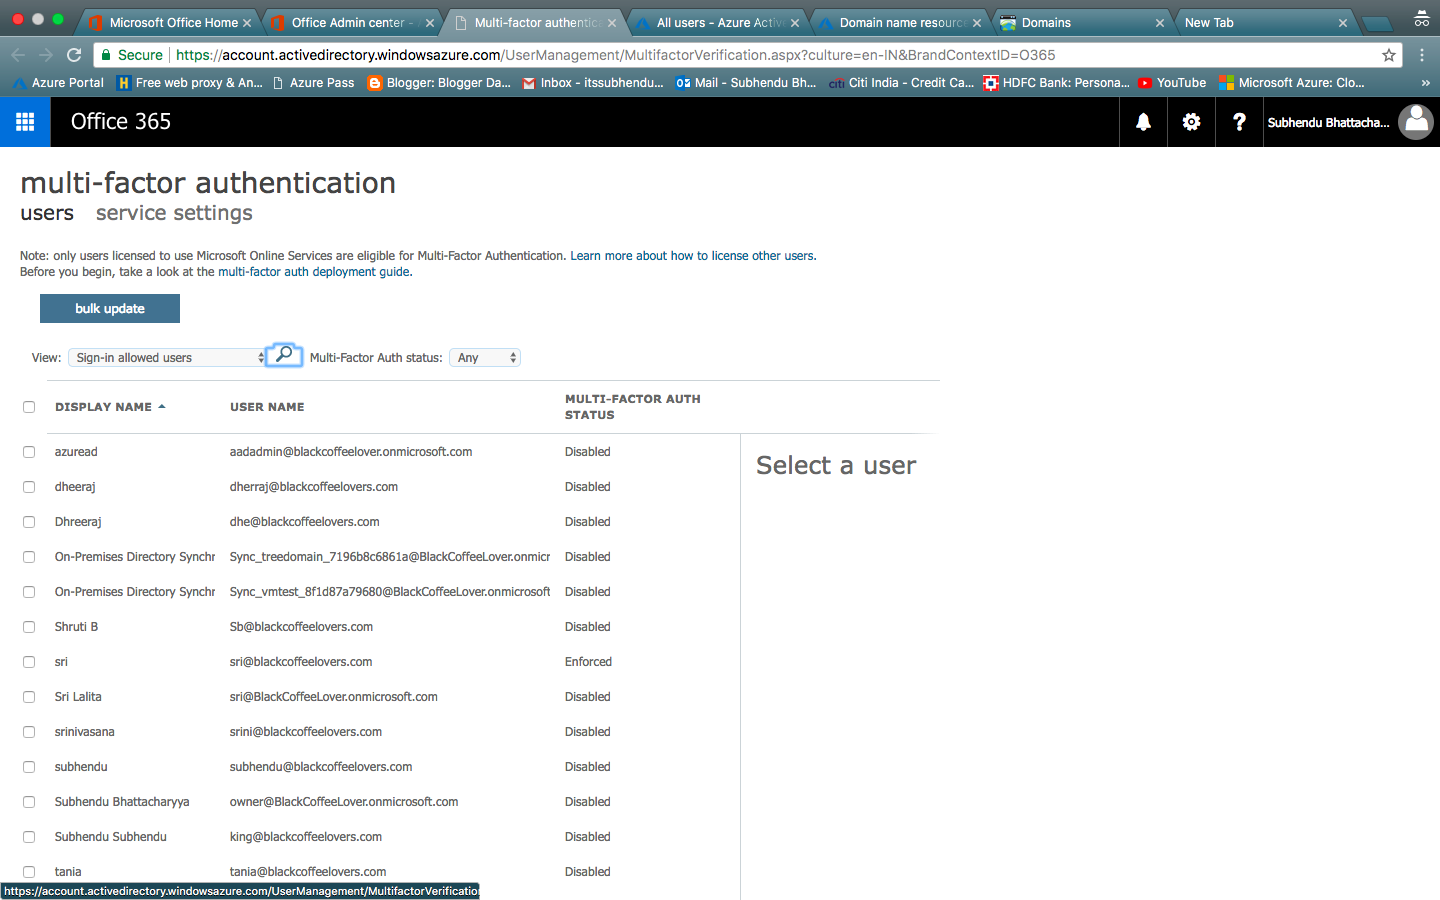
Multi-Factor Authentication : MultiFactor authentication is a process by which you secure your account . In backing site after providing user details , MFA server will send a authentication code to your phone or e-mail and based on that OTP(one time password) you will be authenticated to use portal or any application .
Lab Manual : 20347A-V2-LAK
Lab Notes : 20347A- Student Network Troubleshooting Guide
Thanks for your support . We are done with today’s class and successfully completed first three module . Tomorrow’s practical is a continuation of today’s practical . So if you have not done anything please complete that in night or before tomorrow , otherwise you will face challenges .