Azure Migration Project – Esxi VM Assessment Tool
Greetings !! First of all Happy Diwali to everyone . Live Life – King Size .
I always talk about “Migration Project” in every batch . Unfortunately I don’t had any environment or lab to show you guys . But last two days back I have done testing of this service and here is a step by step guidance to perform .
Before jump to practical , let me talk about Azure Migration Project .
Why use Azure Migrate?
Azure Migrate helps you to:
- Assess Azure readiness: Assess whether your on-premises machines are suitable for running in Azure.
- Get size recommendations: Get size recommendations for Azure VMs based on the performance history of on-premises VMs.
- Estimate monthly costs: Get estimated costs for running on-premises machines in Azure.
- Migrate with high confidence: Visualize dependencies of on-premises machines to create groups of machines that you will assess and migrate together.
How does Azure Migrate work?
- You create an Azure Migrate project.
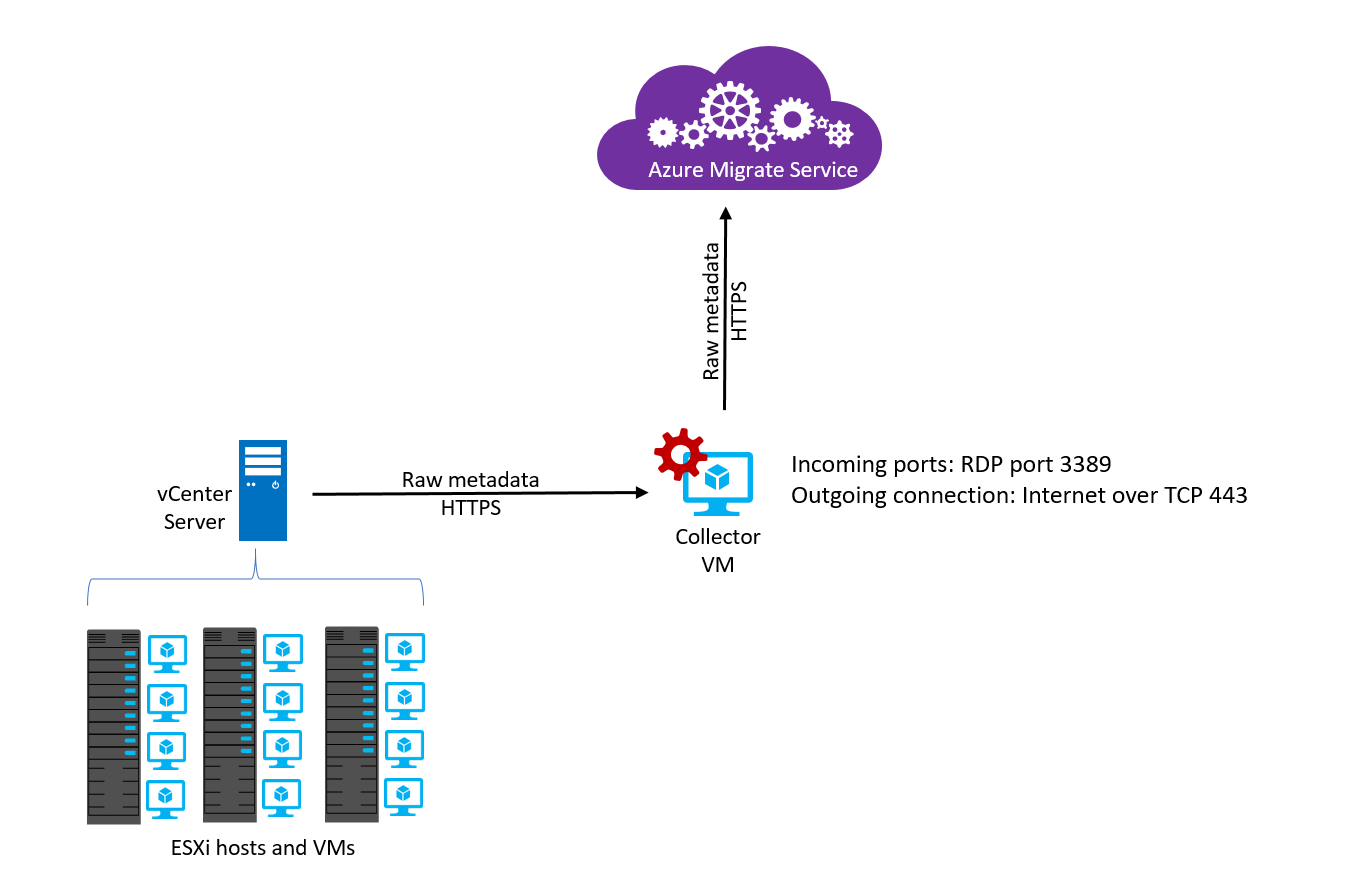
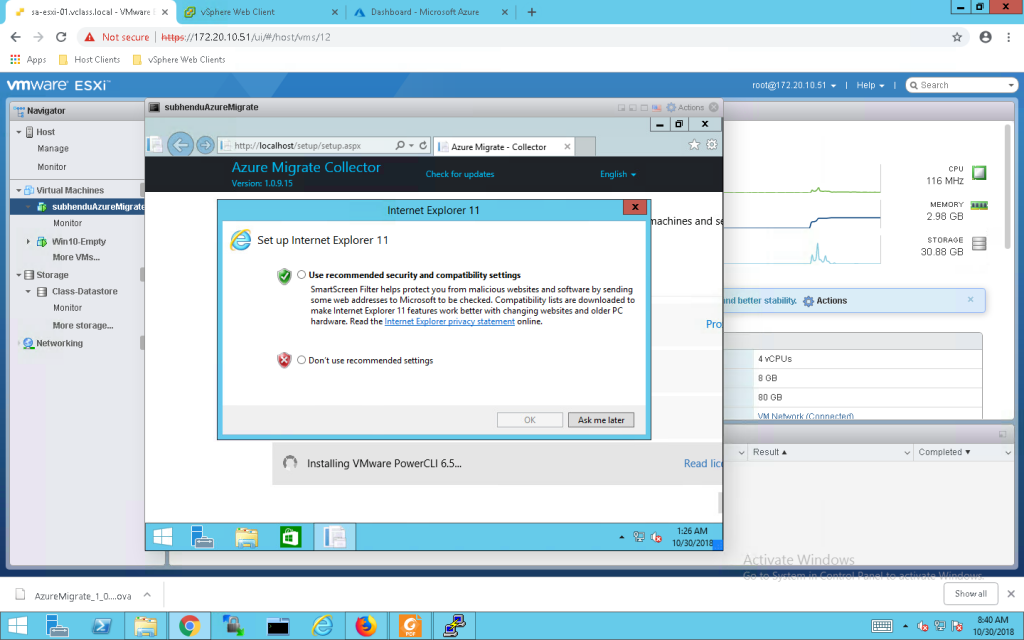
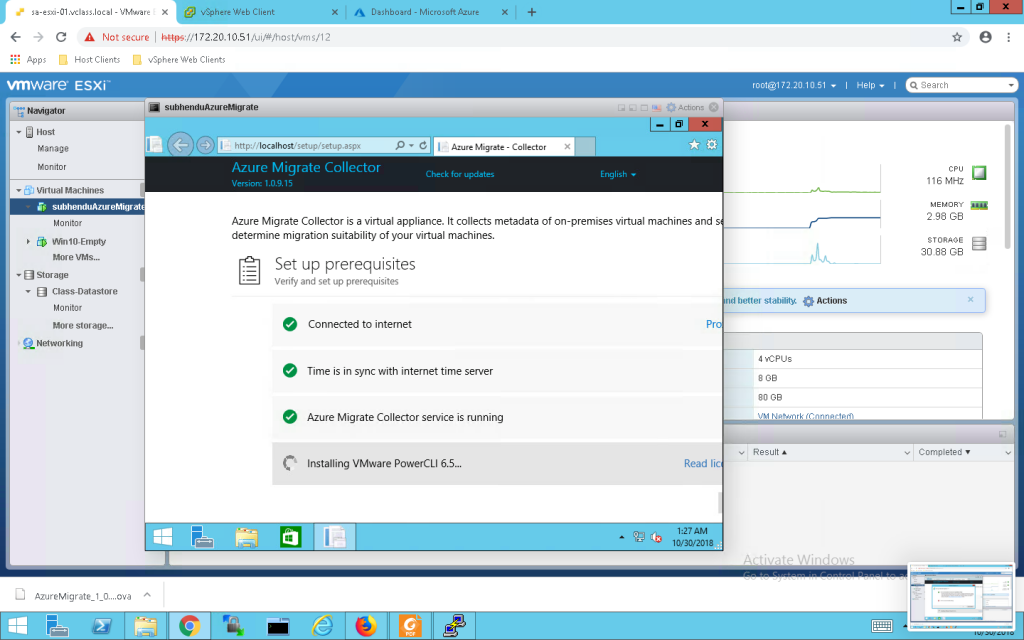
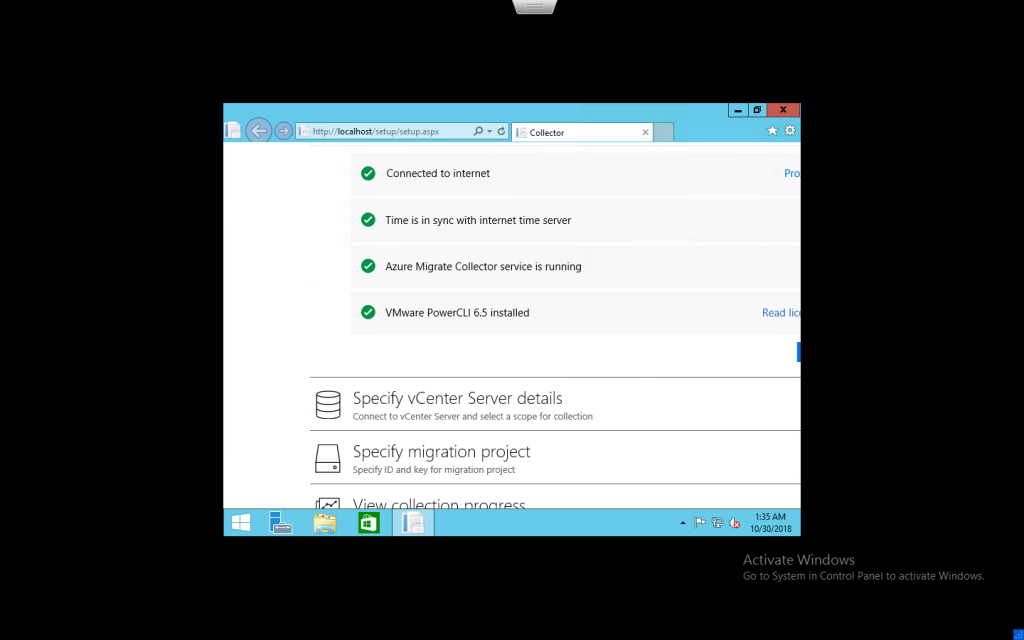
- Azure Migrate uses an on-premises VM called the collector appliance, to discover information about your on-premises machines. To create the appliance, you download a setup file in Open Virtualization Appliance (.ova) format, and import it as a VM on your on-premises vCenter Server.
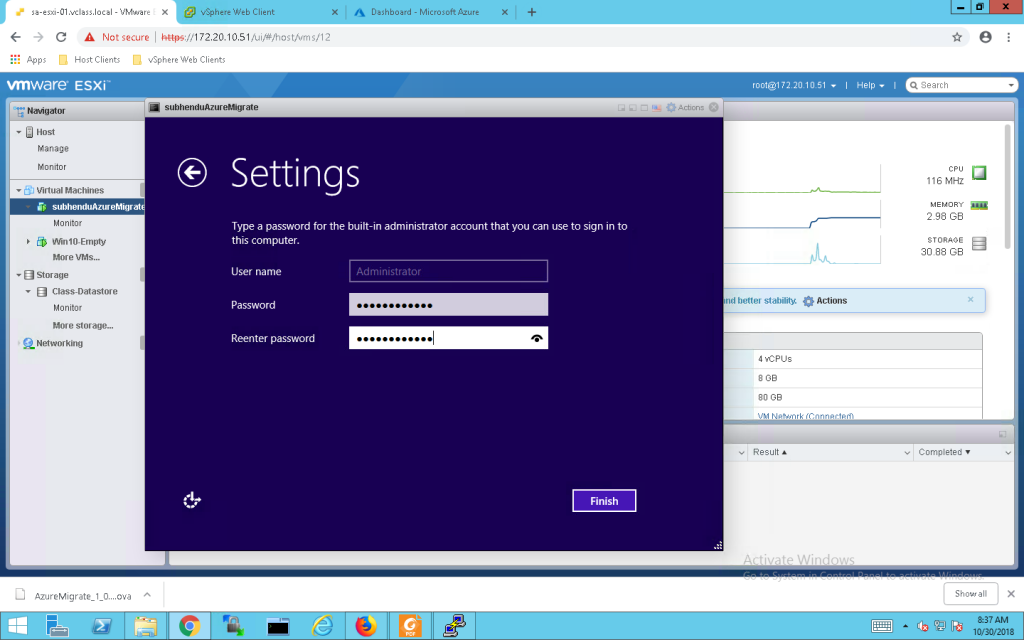
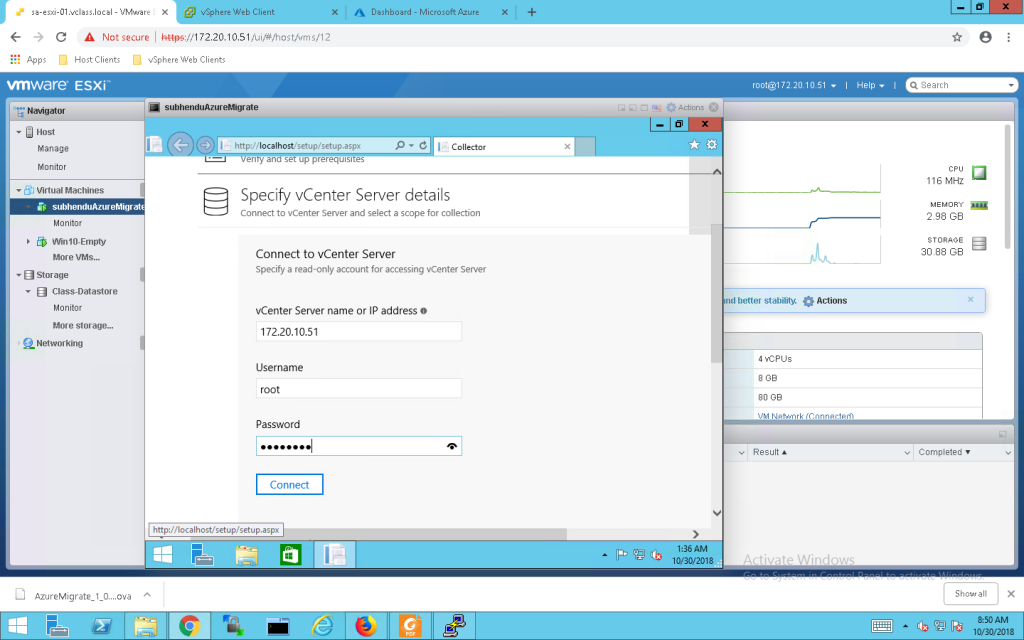
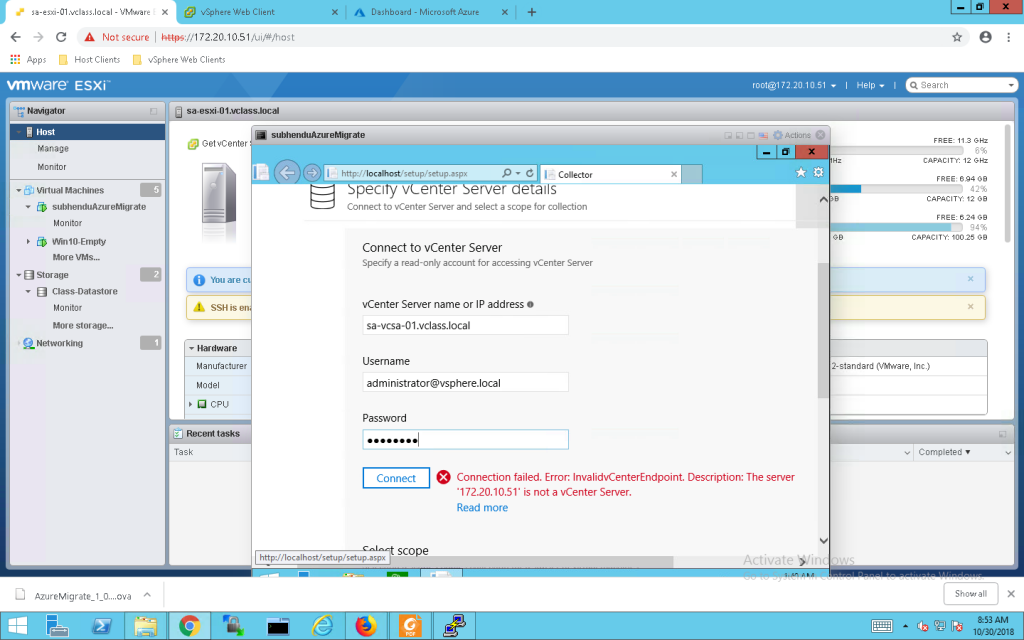
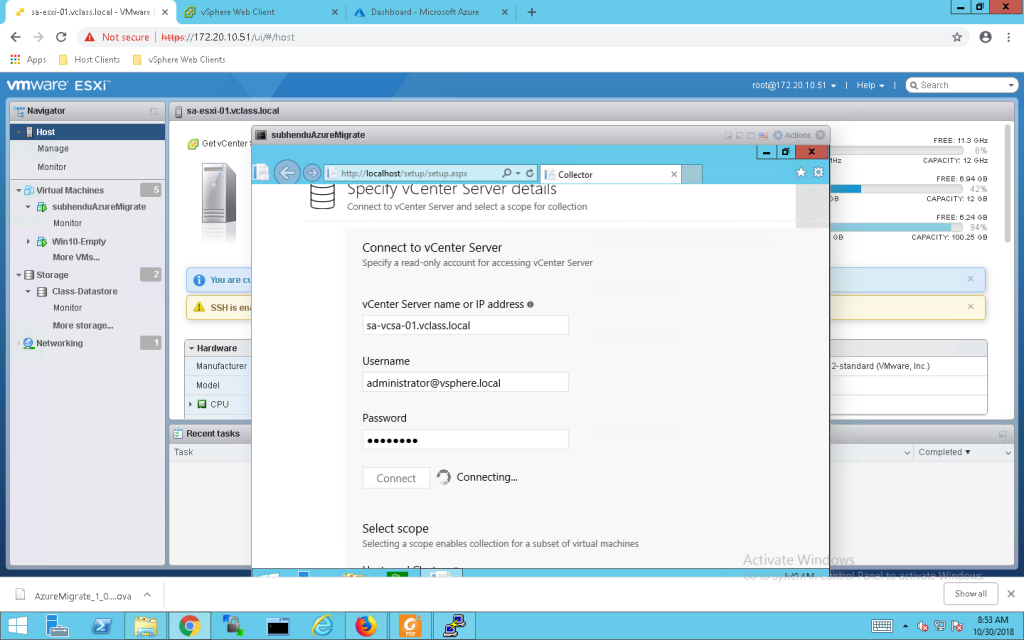
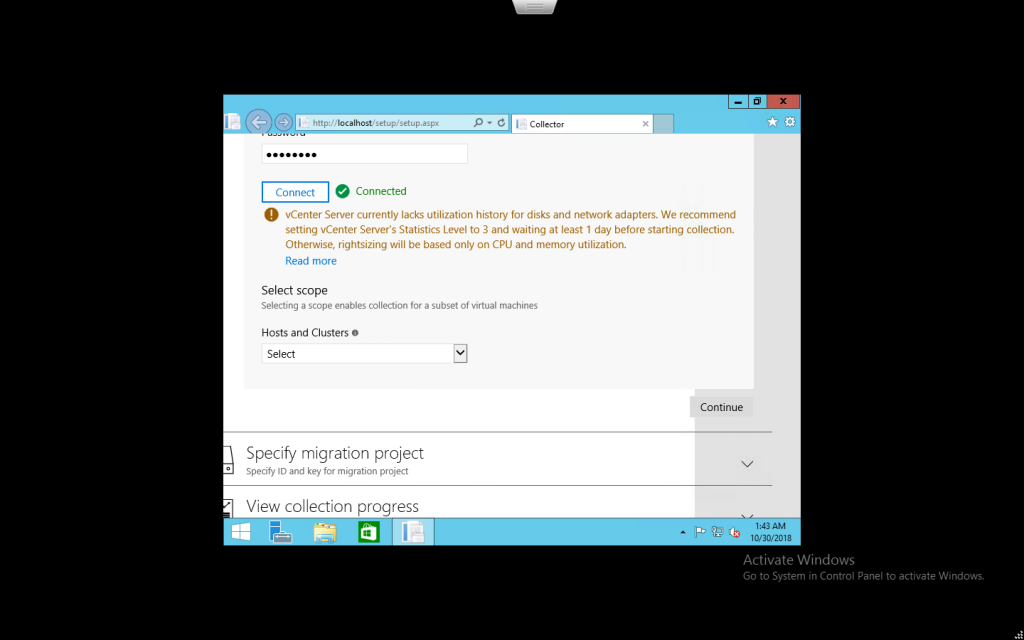
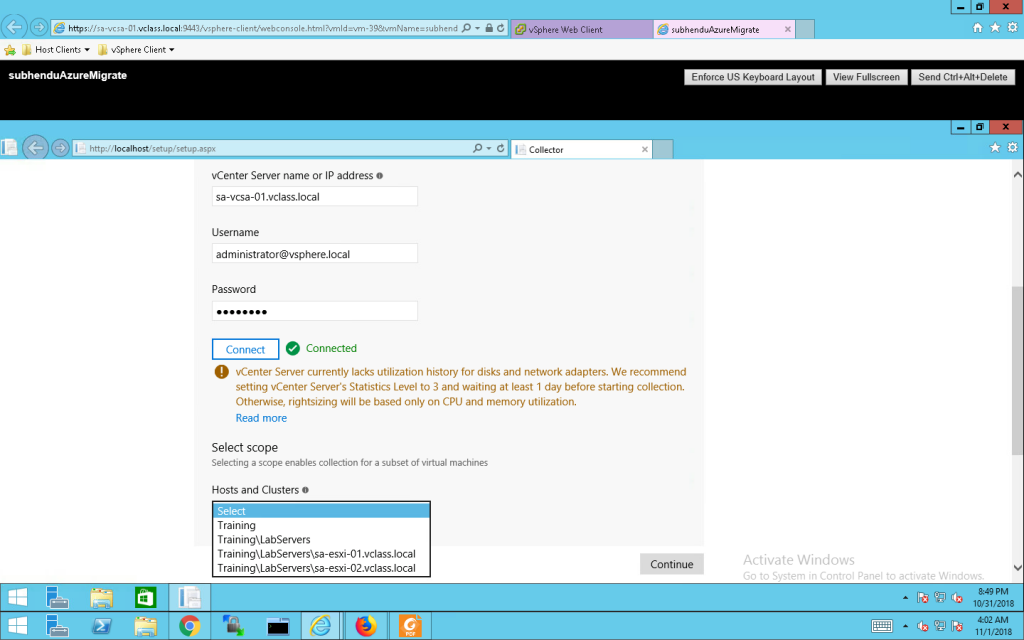
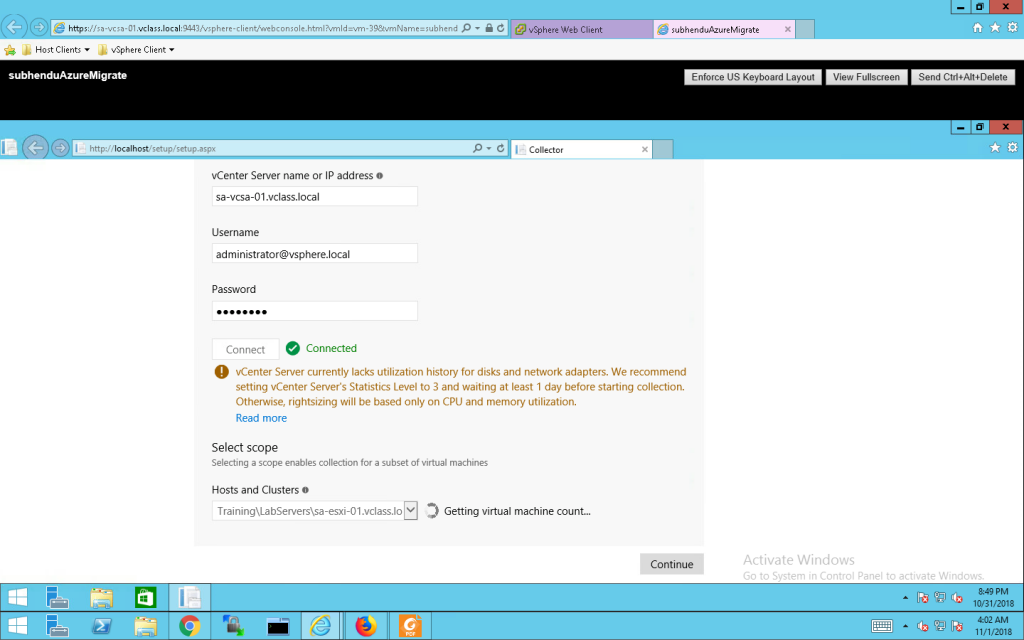
- You connect to the VM from the vCenter Server, and specify a new password for it while connecting.
- You run the collector on the VM to initiate discovery.
- The collector collects VM metadata using the VMware PowerCLI cmdletS. Discovery is agent-less, and doesn’t install anything on VMware hosts or VMs. The collected metadata includes VM information (cores, memory, disks, disk sizes, and network adapters). It also collects performance data for VMs, including CPU and memory usage, disk IOPS, disk throughput (MBps), and network output (MBps).
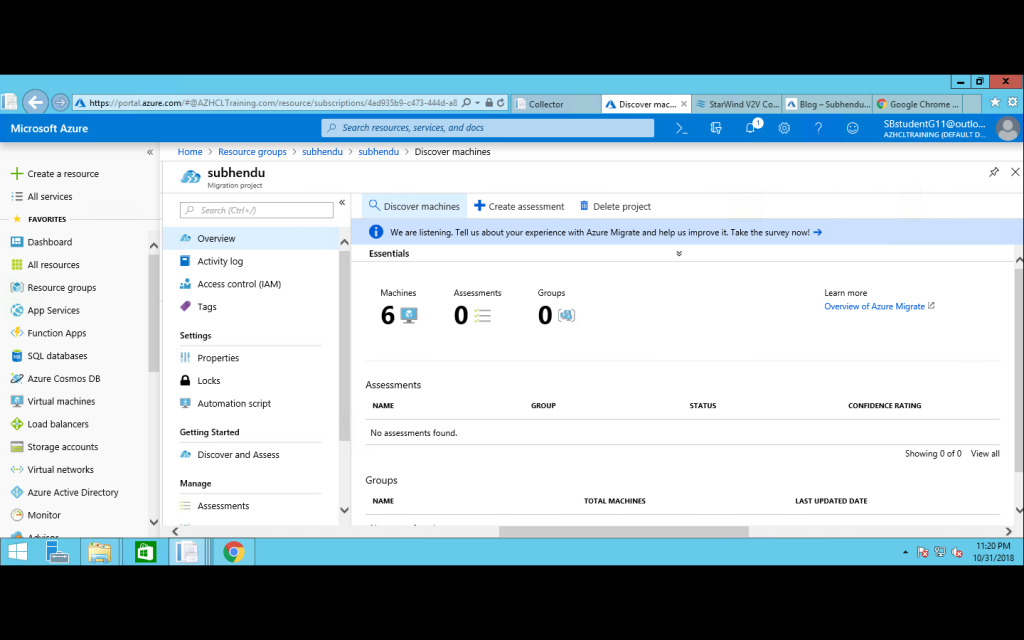
- The metadata is pushed to the Azure Migrate project. You can view it in the Azure portal.
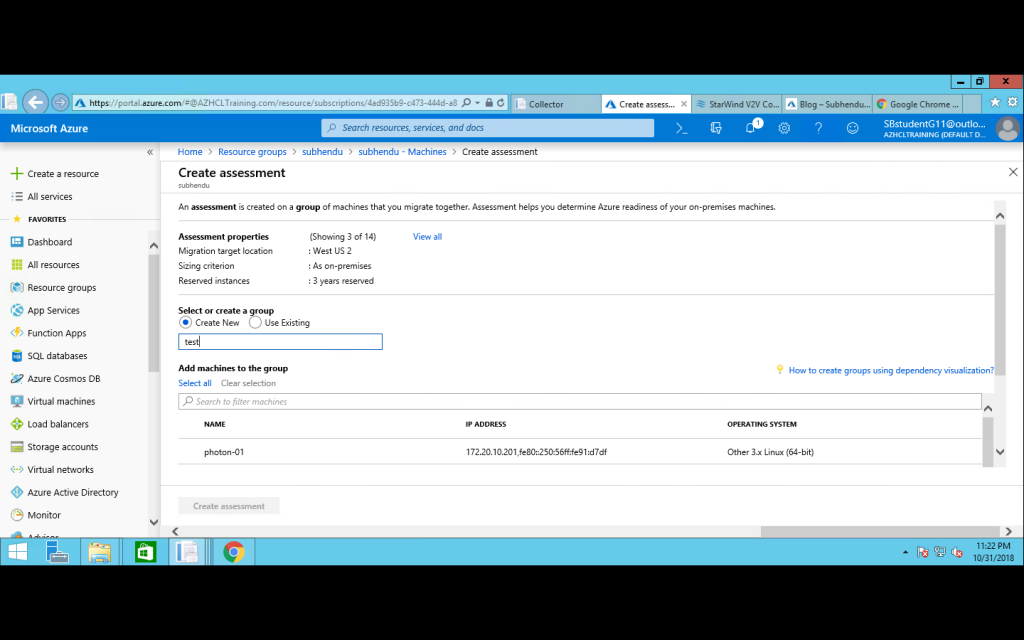
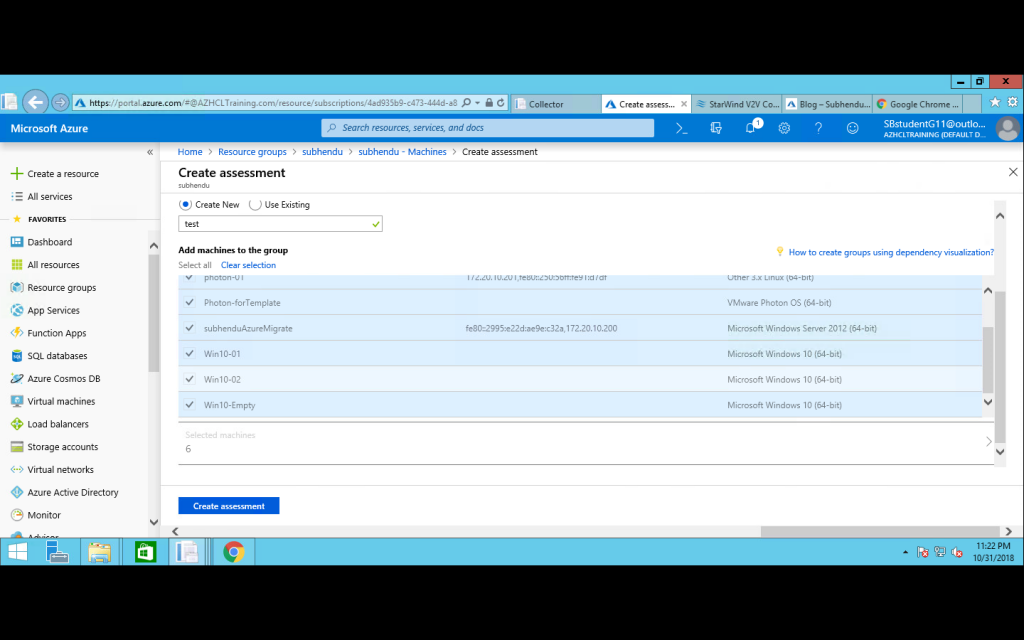
- For the purposes of assessment, you gather the discovered VMs into groups. For example, you might group VMs that run the same application. For more precise grouping, you can use dependency visualisation to view dependencies of a specific machine, or for all machines in a group and refine the group.
- After a group is defined, you create an assessment for it.
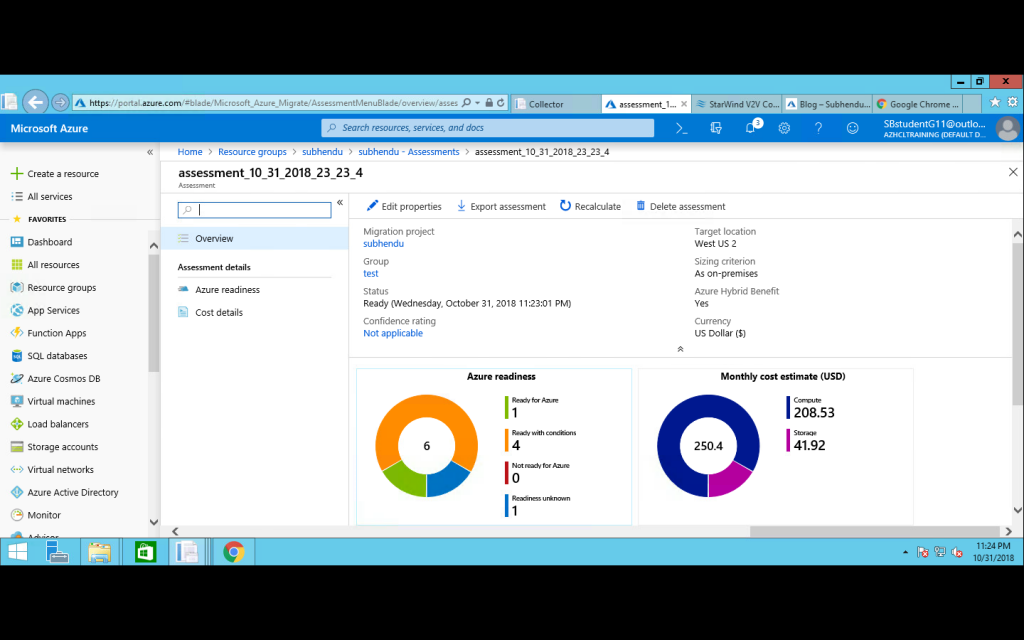
- After the assessment finishes, you can view it in the portal, or download it in Excel format.
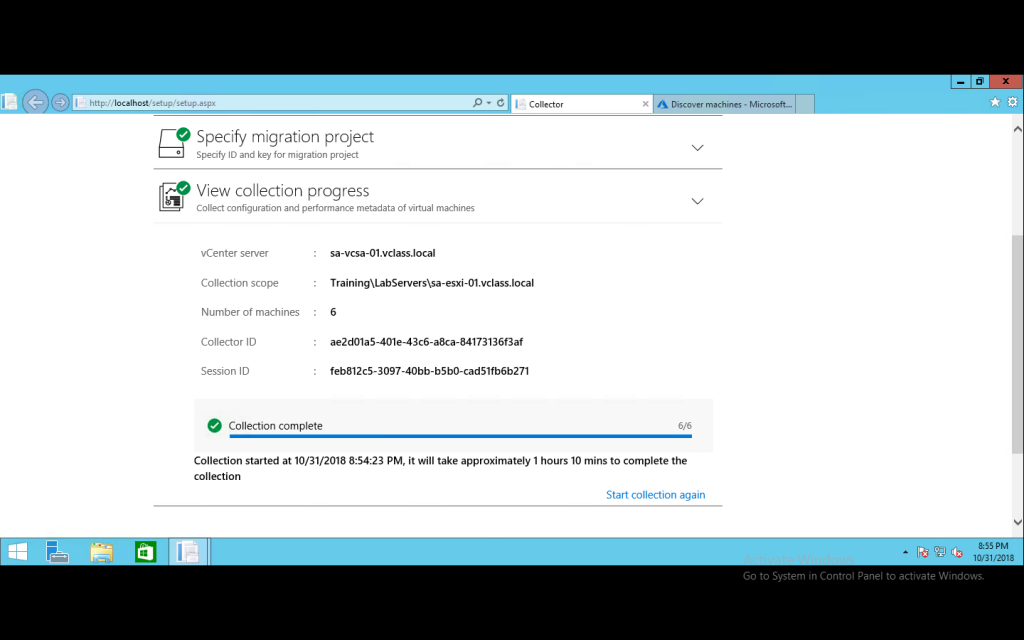
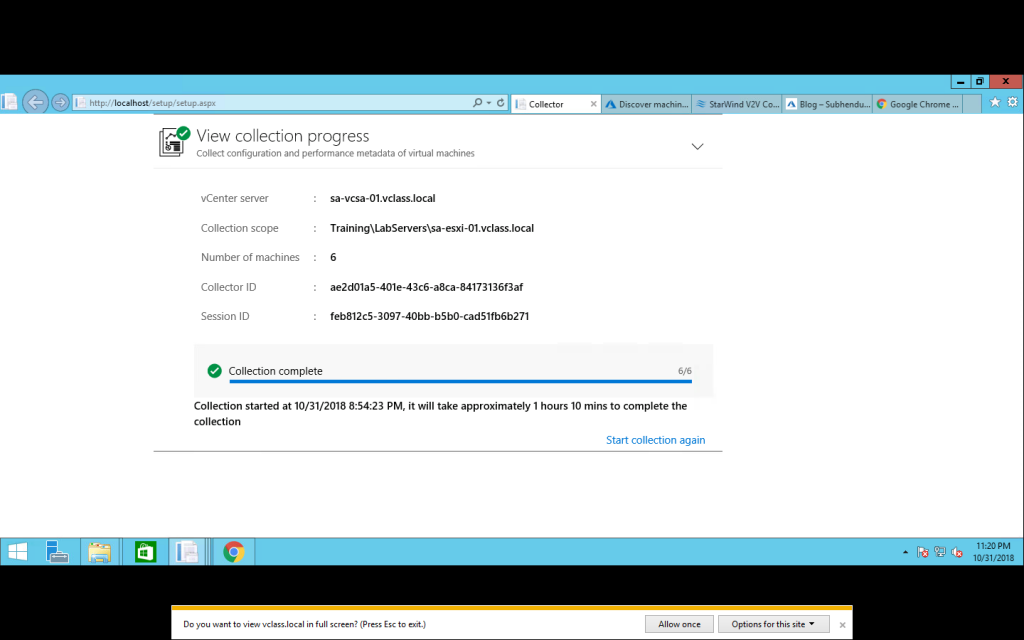
Collected metadata by Collector Appliance ?
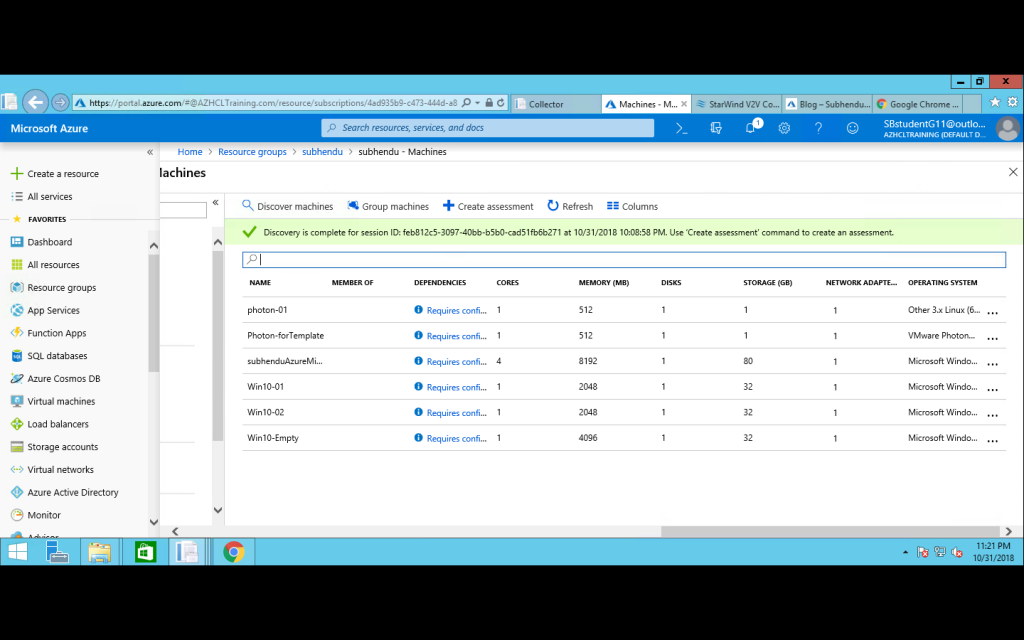
The collector appliance discovers the following static metadata for VMs:
- VM display name (on vCenter Server)
- VM’s inventory path (the host/folder on vCenter Server)
- IP address
- MAC address
- Operating system
- Number of cores, disks, NICs
- Memory size, Disk sizes
- Performance counters of the VM, disk and network.
Let’s get started :
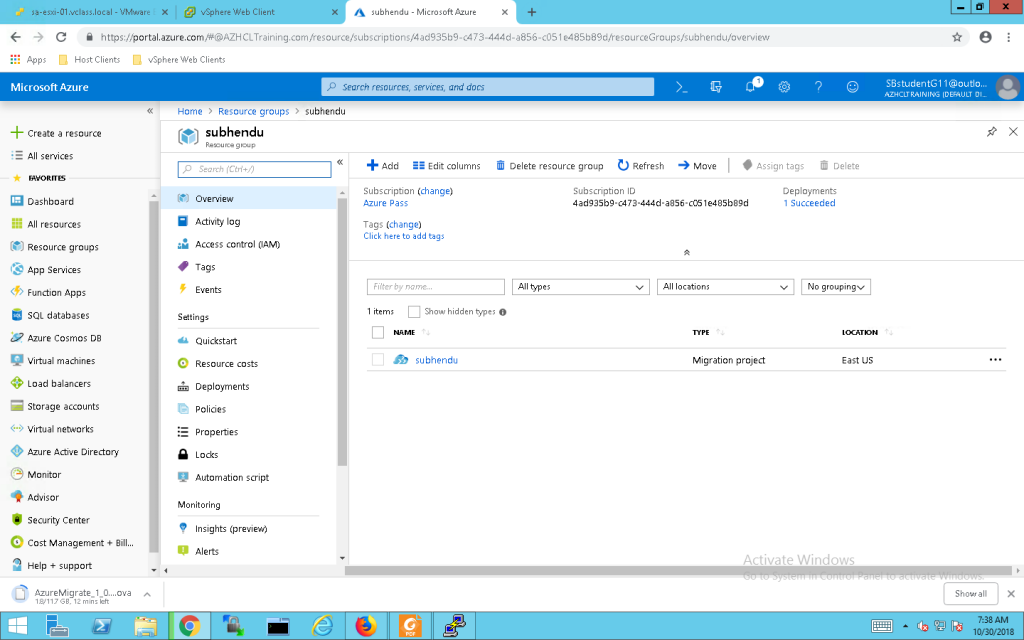
This is my Azure Subscription , wher I have created a Migration Project . To create a Migration Project go to “all service” -> search for ” migration project ” and then create a migration project .
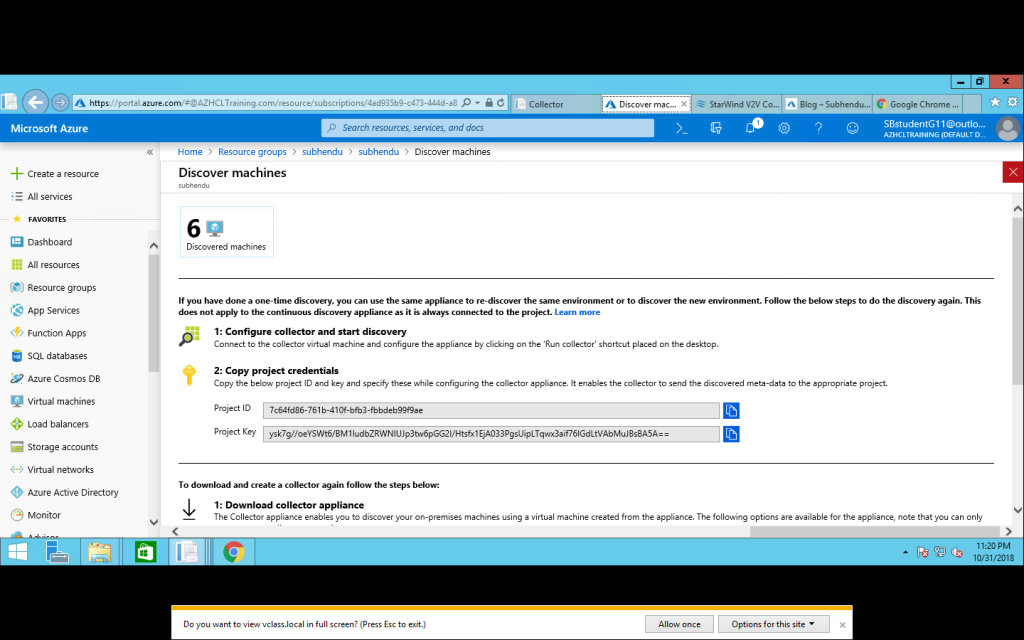
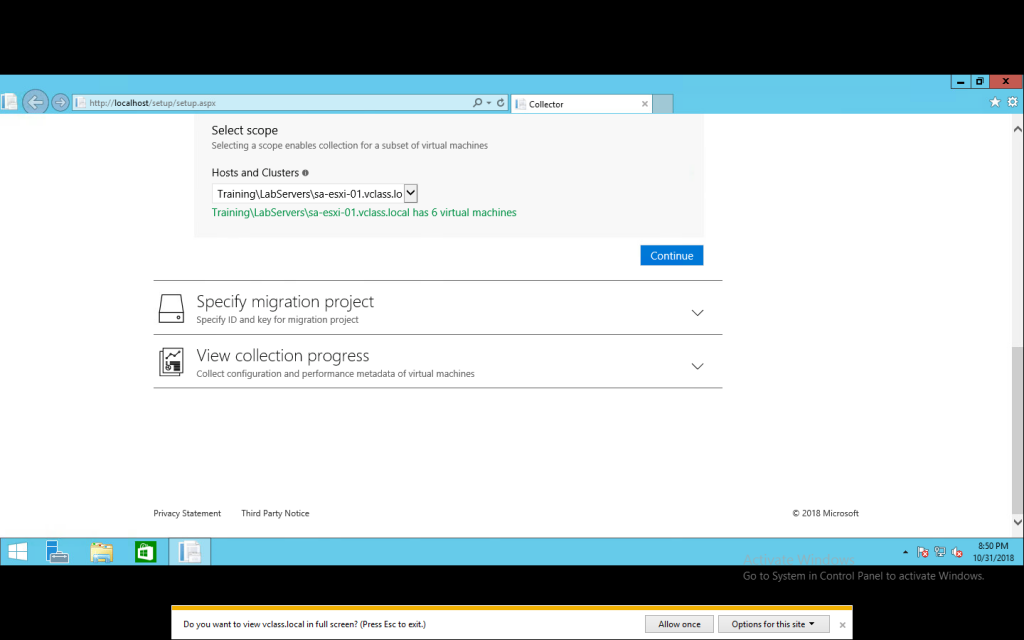
After creating a migration project open your project and click on discover and access .
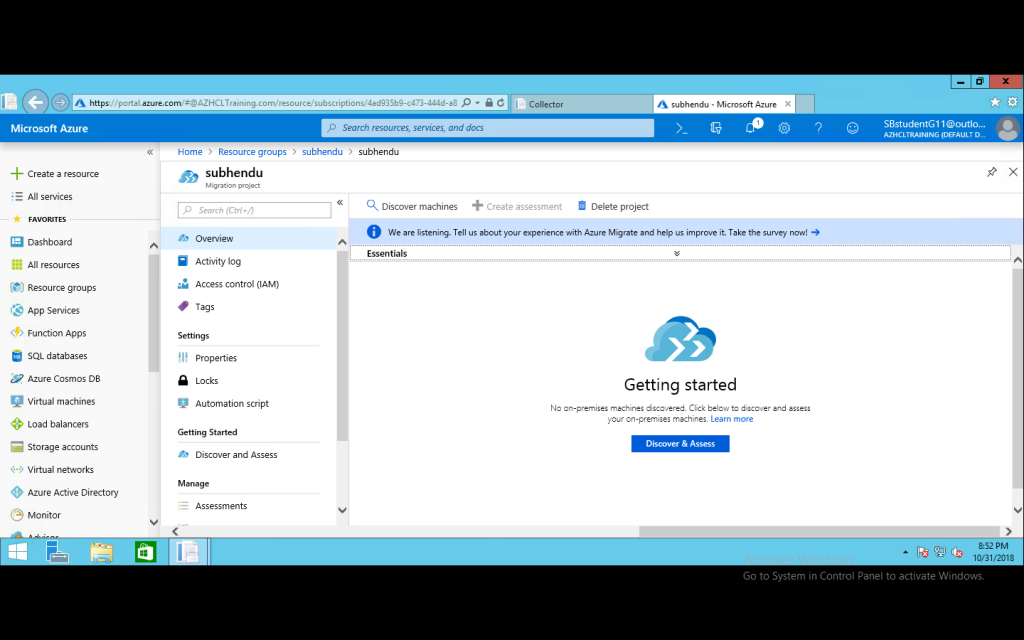
Discover and access will take you to VM discovery process .
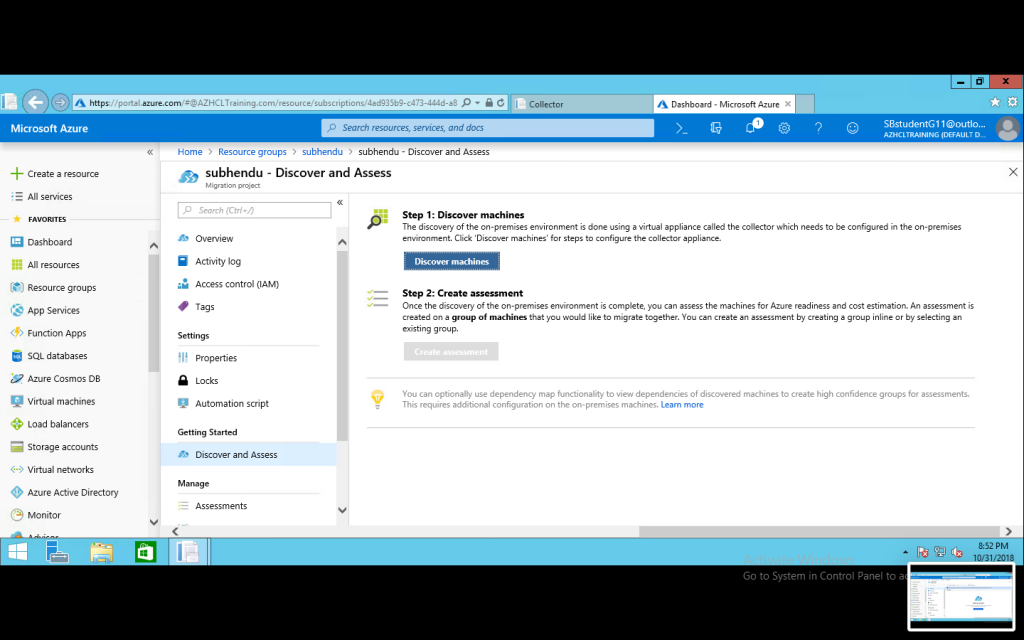
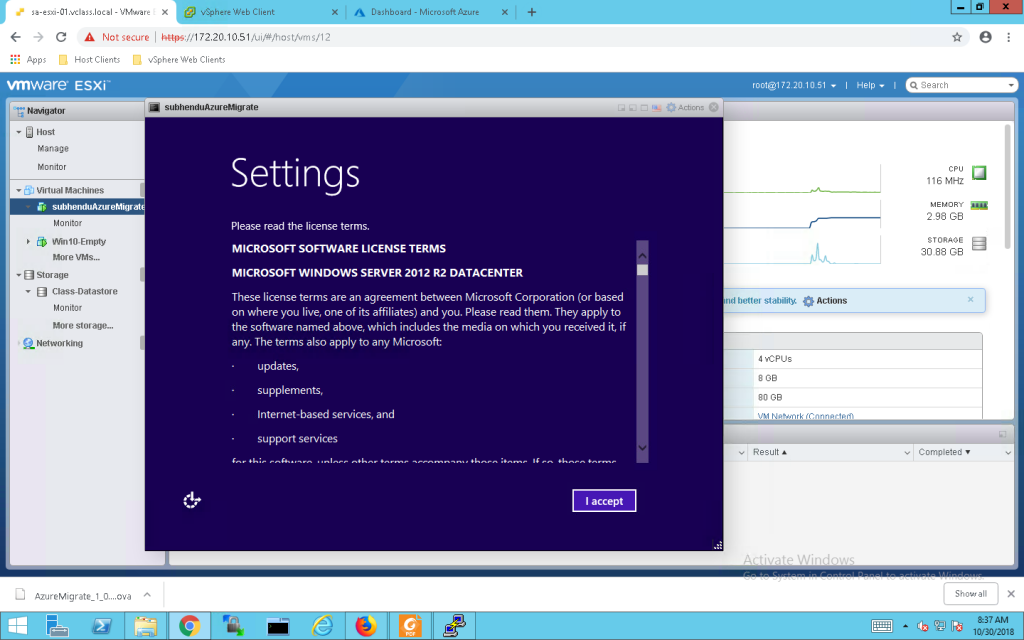
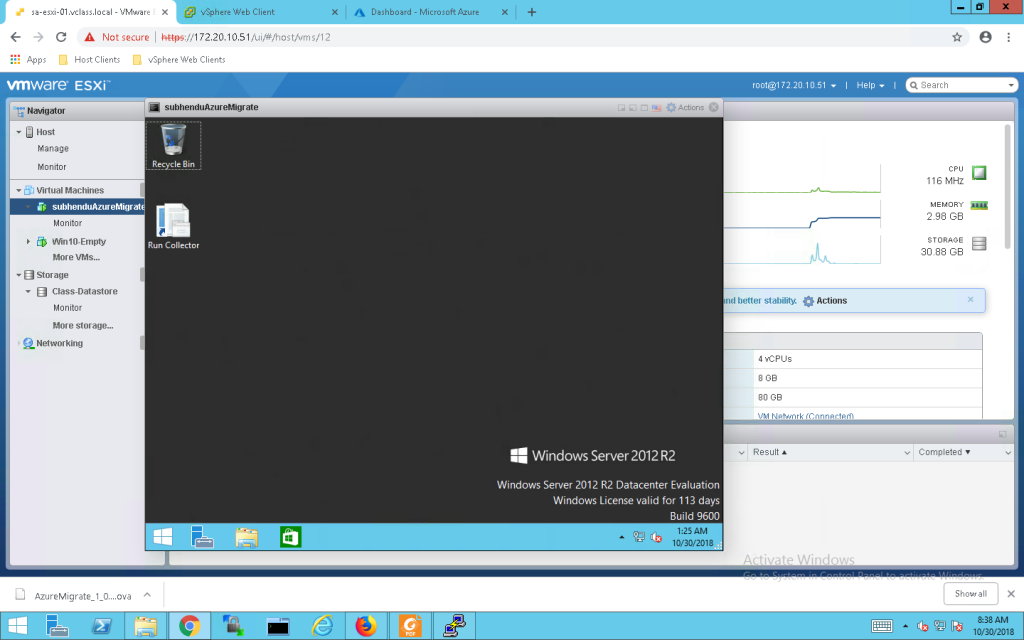
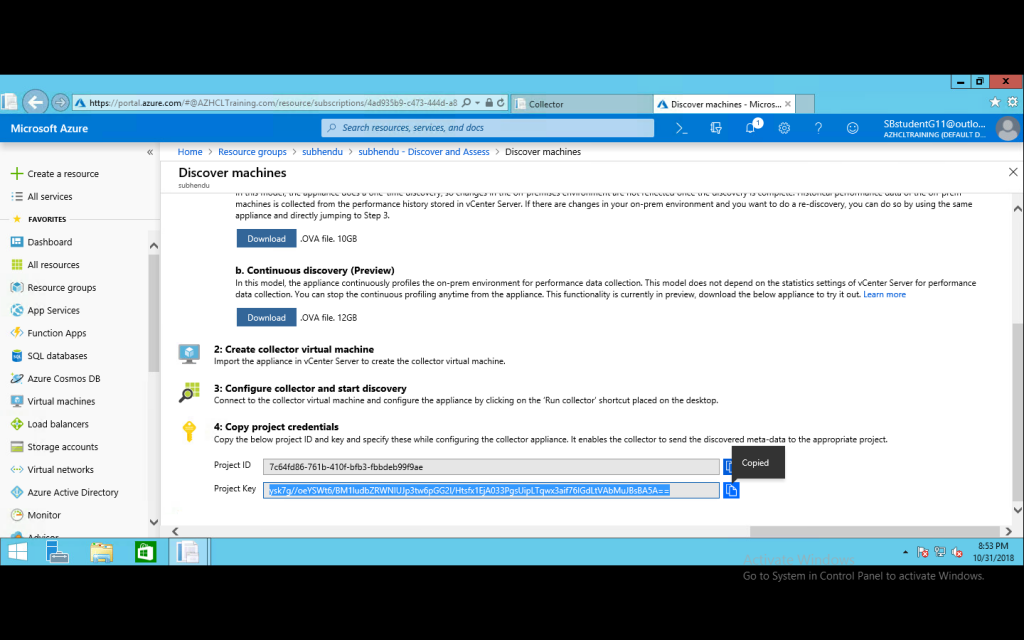
Once you click on “Discover Machine” – you need to download a .OVA file . From the OVF, VMware sets up a VM with 4 cores, 8 GB RAM, and one disk of 80 GB. The operating system is Windows Server 2012 R2 (64 bit).
The collector comes with a Windows Server 2012 R2 evaluation license which is valid for 180 days. If the evaluation period is expiring for your collector VM, it is recommended to download a new OVA and create a new appliance.
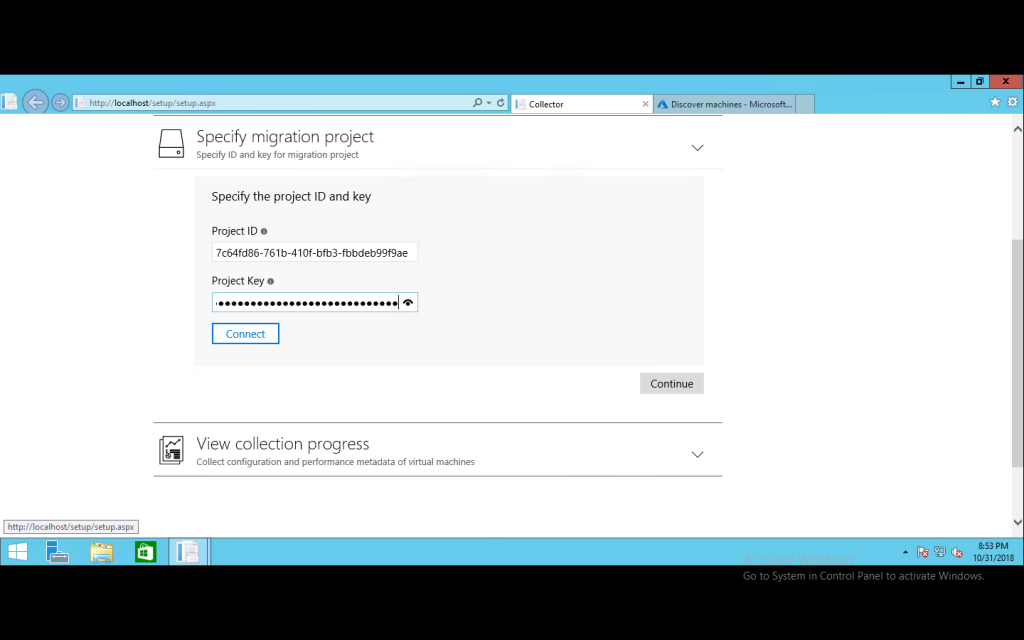
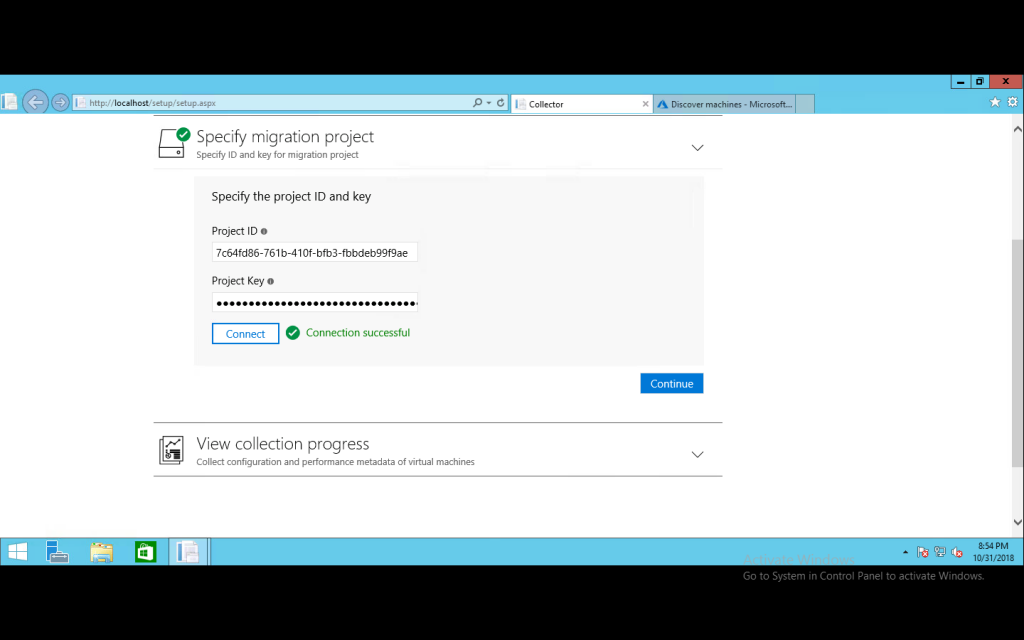
How collector is connected with Azure Migration service ?
For OVA version 1.0.9.15
| Algorithm | Hash value |
|---|---|
| MD5 | e9ef16b0c837638c506b5fc0ef75ebfa |
| SHA1 | 37b4b1e92b3c6ac2782ff5258450df6686c89864 |
| SHA256 | 8a86fc17f69b69968eb20a5c4c288c194cdcffb4ee6568d85ae5ba96835559ba |

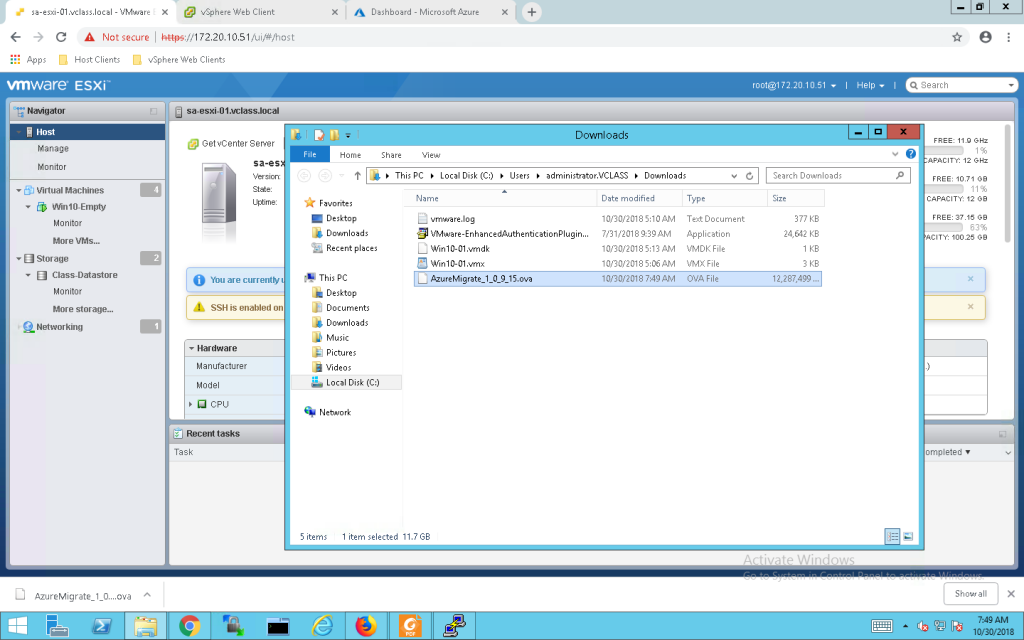
This is my VmWare environment –
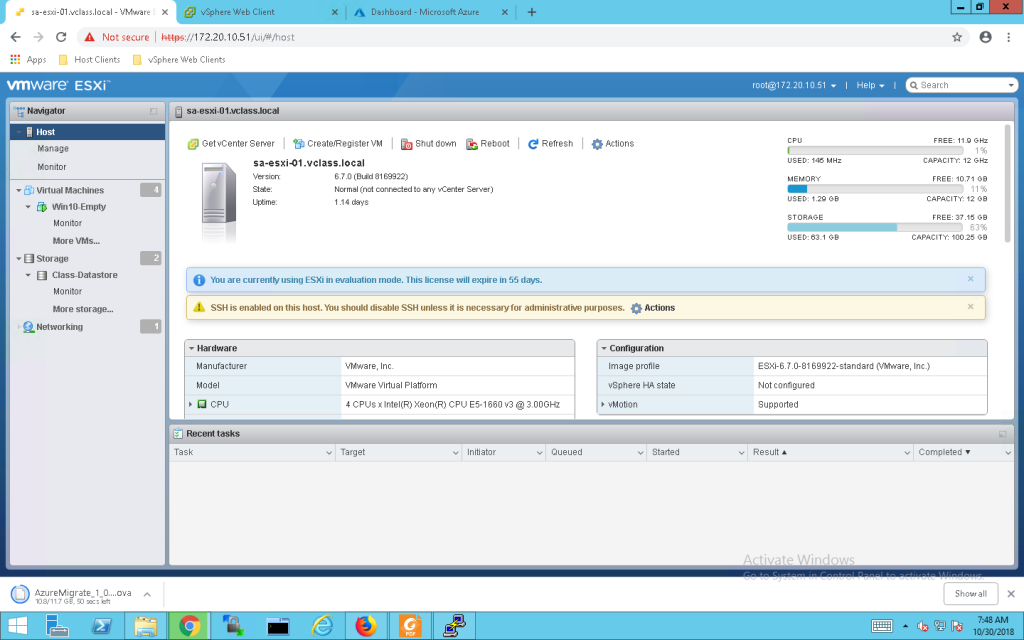
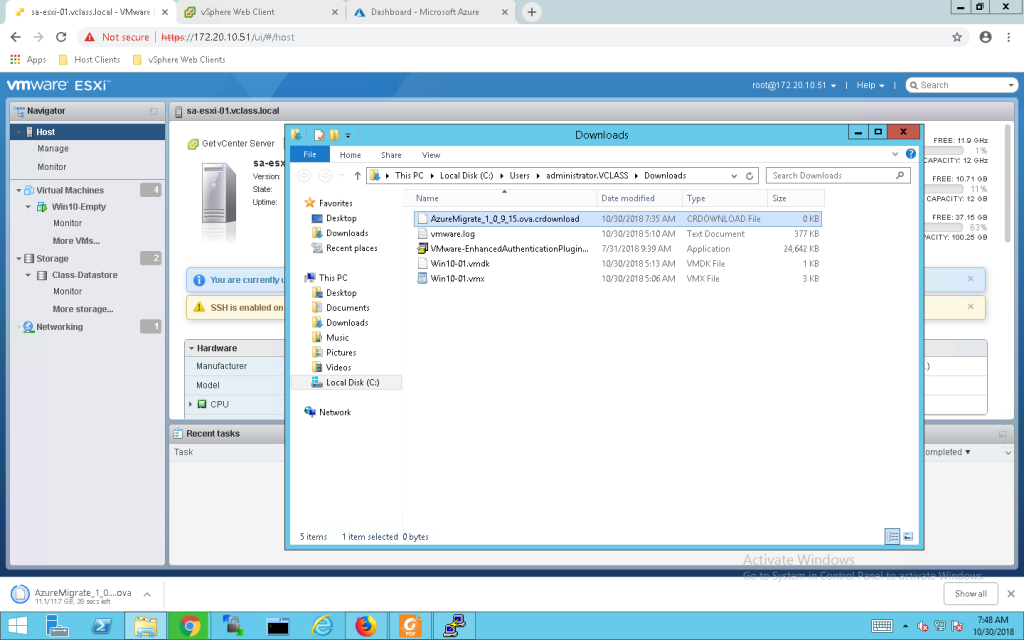
Here I am downloading that “.OVA” file .
from there VCenter management console I am creating a VM using that .OVA file .
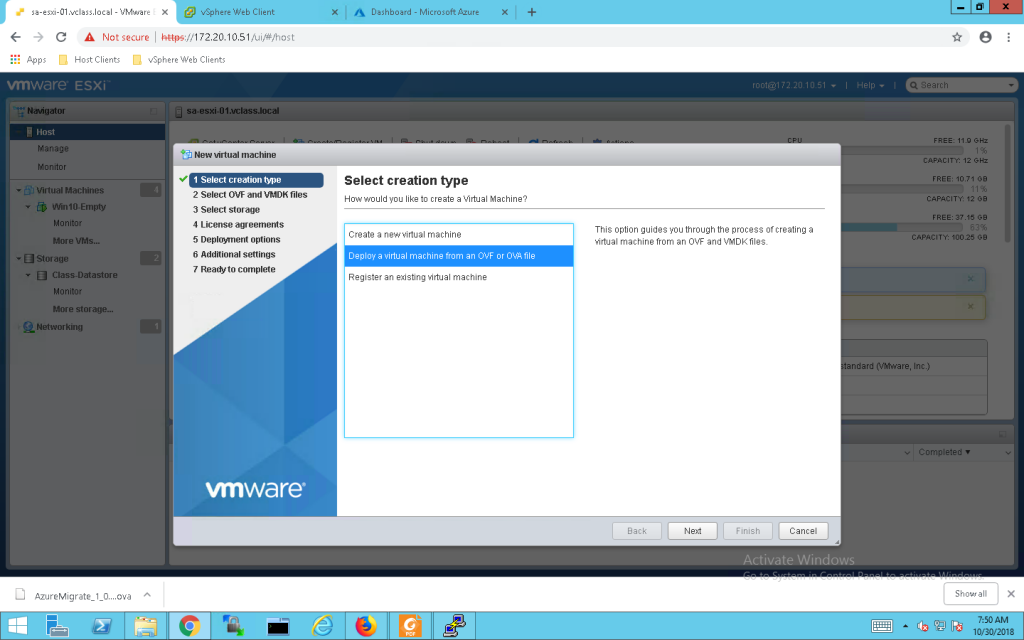
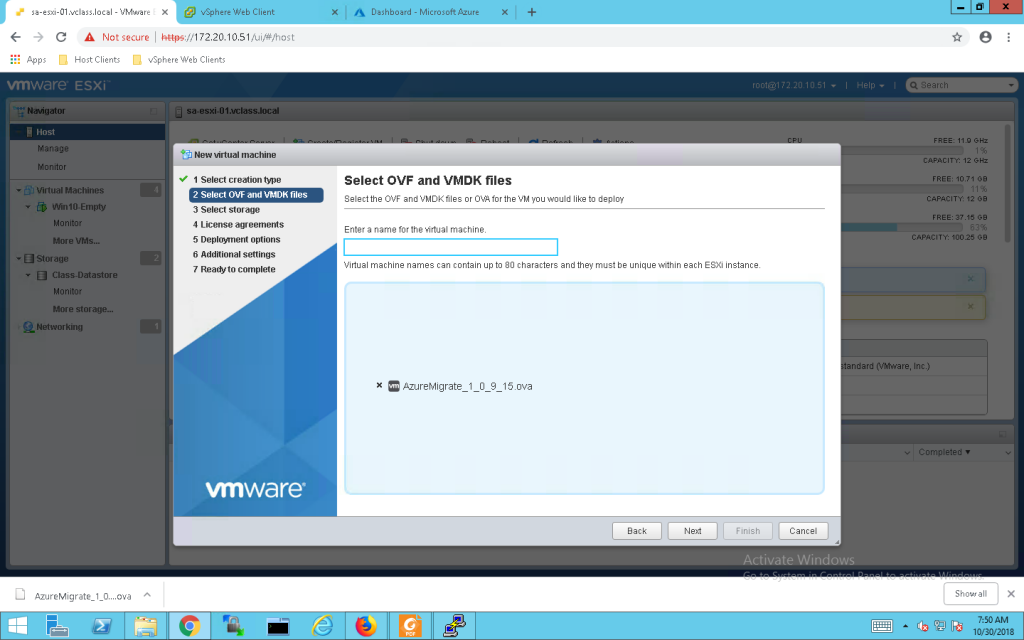
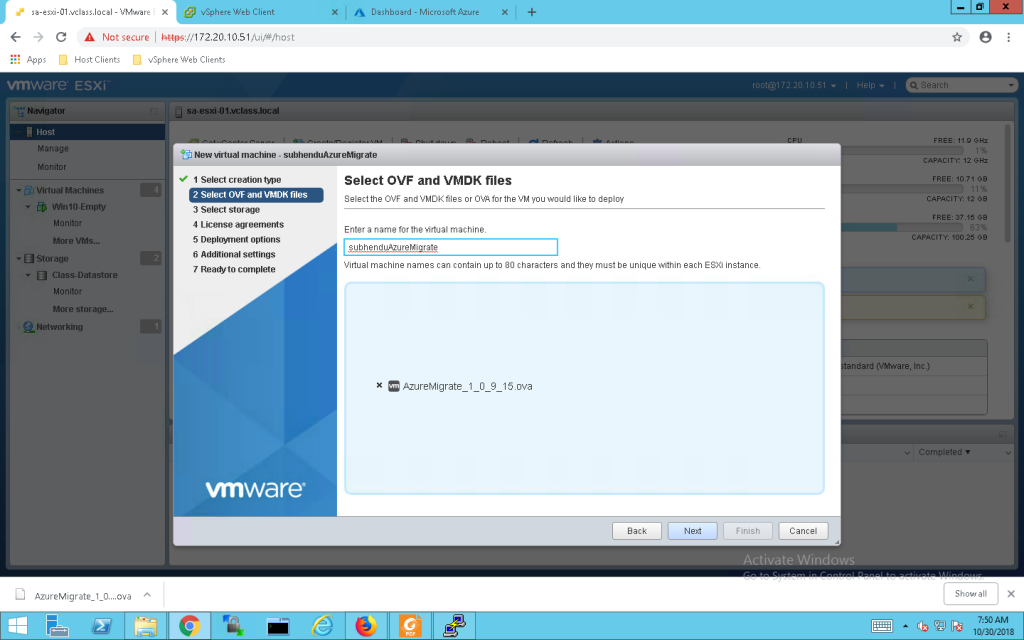
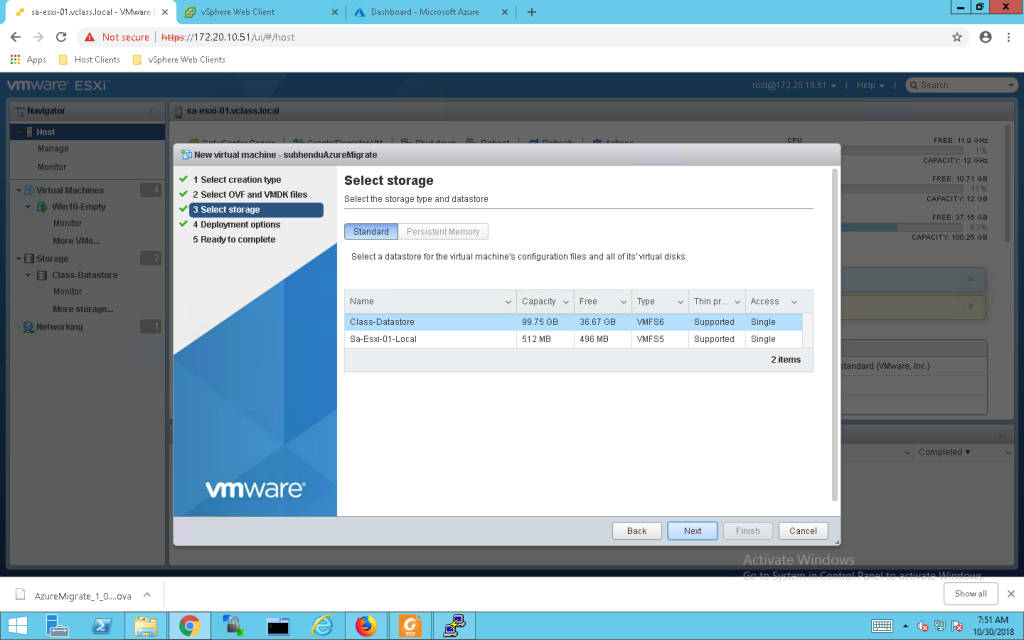

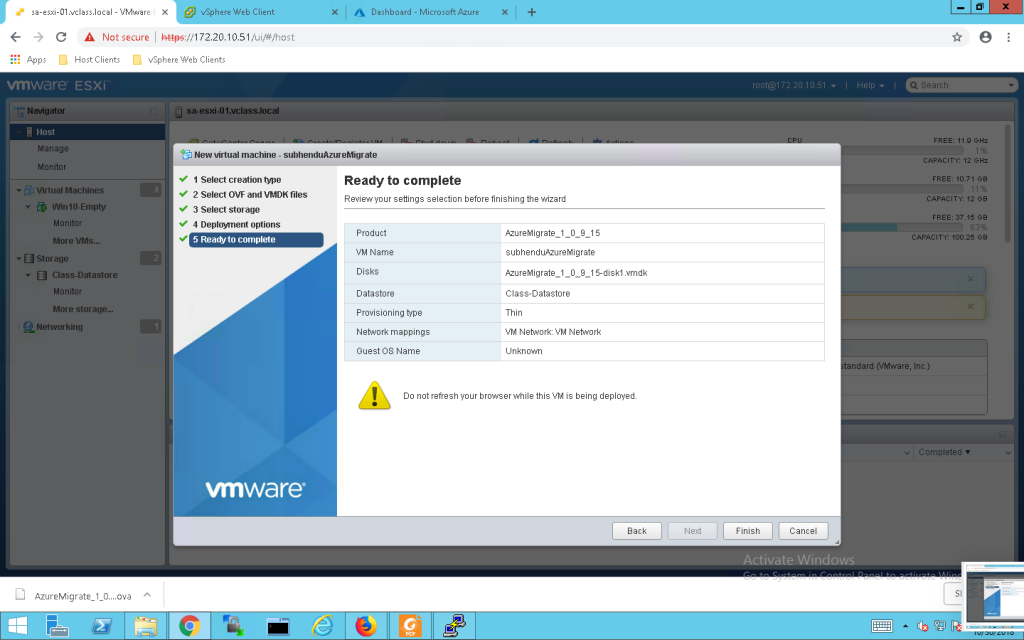

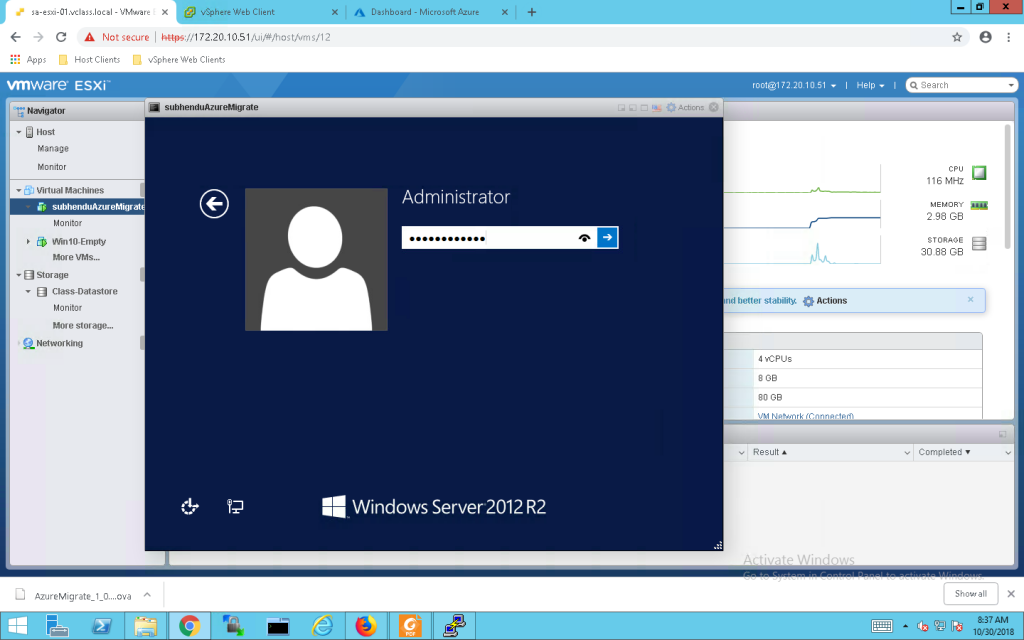
Here I am done with VM creation and this is my VM .
Once your VM is ready you can find a collector file in desktop .

Once your entire process is done you will get all your esxi VM in azure portal .